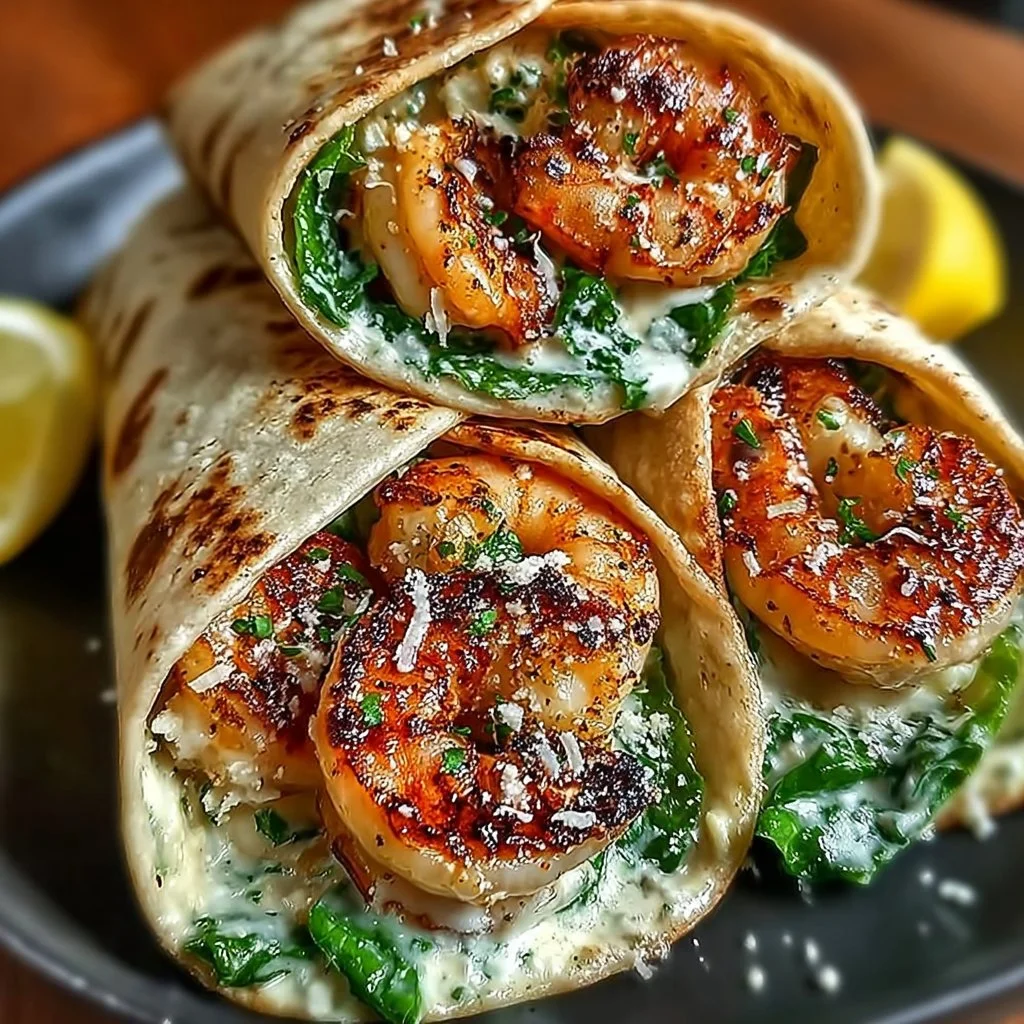
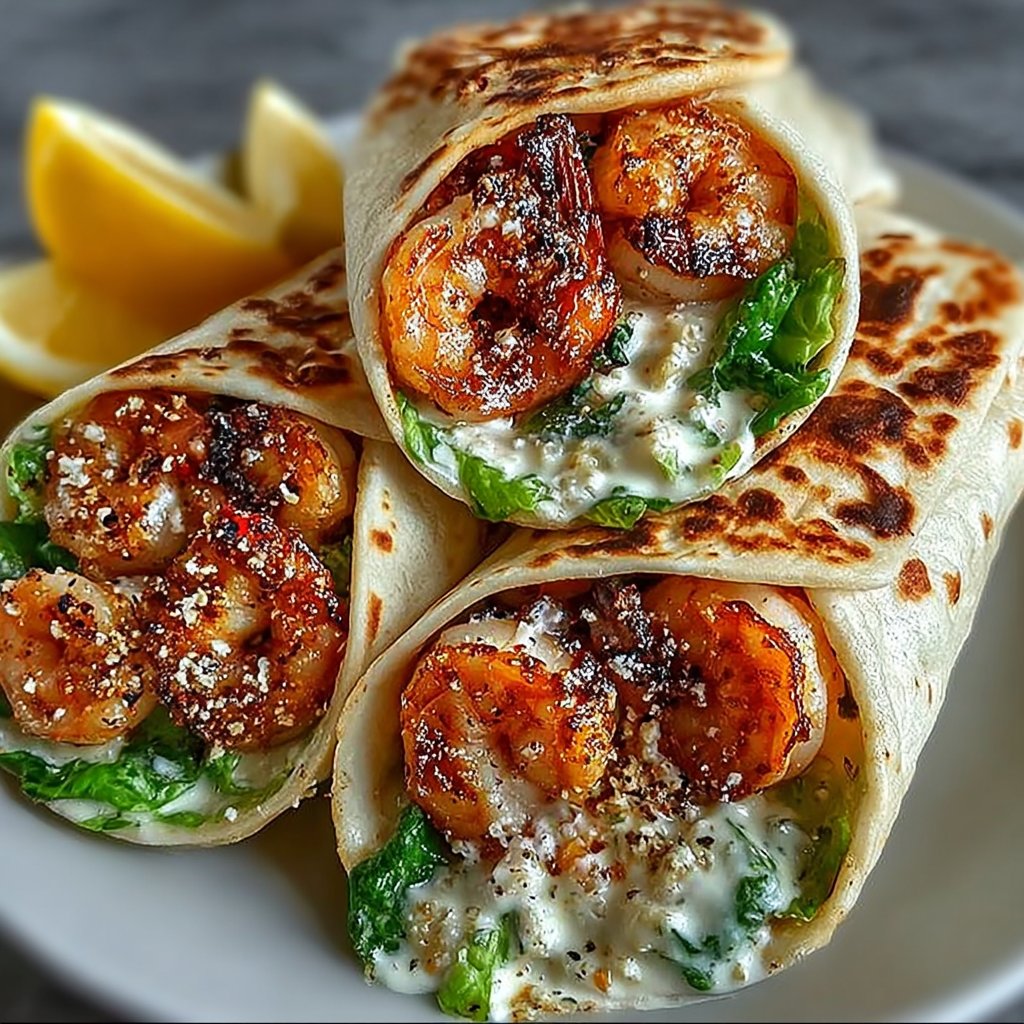
Creamy, juicy, and packed with savory flavor, these Grilled Shrimp Caesar Wraps are the kind of quick, satisfying meal that feels indulgent without any fuss. Imagine perfectly charred shrimp, tossed with crisp romaine, Parmesan, and a tangy Caesar dressing, all wrapped up in a warm flour tortilla — pure handheld comfort. Fun fact: Caesar-style salads were originally created in the 1920s in Mexico, but tossing them into a wrap is a modern twist that everyone seems to love.
This recipe is special because it combines simplicity with bright, bold flavors and comes together in under 20 minutes. It’s perfect for busy weeknights, light lunches, or a game-day snack the whole family will fight over. If you enjoy seafood wraps, you might also like the rich textures in a stuffed seafood entrée like the Crab and Shrimp Stuffed Salmon, but these wraps are much faster to make and easier to share. Give them a try — they’re addictive.
What is Grilled Shrimp Caesar Wraps?
What’s in a name? Grilled Shrimp Caesar Wraps are exactly what they sound like: Caesar salad meets grilled shrimp, all snug inside a soft tortilla. Curious about the origin? Think of it as a salad that decided to go portable — a Caesar that packed its lunch and hit the grill. Who wouldn’t want that?
Is it a salad? Is it a sandwich? It’s a little bit of both, and that’s the charm. Some say “the way to a man’s heart is through his stomach,” and honestly, that line rings true here — one bite of these wraps and hearts (and stomachs) will be won over. Try them and see for yourself — the combination of warm shrimp and cool, creamy Caesar is hard to beat.
Why You’ll Love This
- The main highlight: succulent, charred shrimp paired with creamy Caesar dressing and nutty Parmesan creates a delightful contrast of textures and flavors that delights every bite.
- Cost-saving benefits: making this at home uses affordable ingredients — shrimp, lettuce, and pantry staples — and yields several servings for far less than takeout.
- Flavorful toppings: simple additions like a squeeze of lemon, extra Parmesan, or a sprinkle of cracked pepper elevate the wraps and keep them fresh and bright.
If you loved our seafood-forward dishes like the hearty stuffed salmon, these wraps offer a lighter, quicker alternative that still satisfies those same cravings. Ready to make them? Let’s roll.
How to Make:
Quick Overview
This recipe is straightforward: toss shrimp in a little oil and seasoning, grill until pink, mix lettuce with Caesar and Parmesan, and wrap. The combination of creamy sauce, crisp lettuce, and warm shrimp makes every bite balanced and satisfying. Prep time is about 10 minutes and cooking takes roughly 6 to 8 minutes, so you can be eating in about 20 minutes total.
Ingredients
- 12 large shrimp, peeled and deveined (tails removed if preferred)
- 2 large flour tortillas, warmed
- 1 cup Caesar salad dressing, chilled
- 2 cups Romaine lettuce, washed and chopped
- 1/2 cup shredded Parmesan cheese, finely shredded
- 1 tbsp olive oil, extra virgin if available
- 1/2 tsp garlic powder
- Salt and pepper to taste, freshly cracked pepper recommended
- Lemon wedges for serving, cut into quarters
Directions
- Preheat your grill or grill pan over medium-high heat until hot and lightly oiled.
- Pat the shrimp dry with paper towels. In a bowl, toss shrimp with 1 tablespoon olive oil, 1/2 teaspoon garlic powder, and a generous pinch of salt and pepper until evenly coated.
- Arrange the shrimp on the preheated grill or grill pan in a single layer. Cook for 2 to 3 minutes on the first side without moving them, until grill marks appear and shrimp begin to turn pink.
- Flip the shrimp and cook another 2 to 3 minutes until opaque and cooked through. Remove from heat and set aside to rest briefly.
- In a large bowl, combine 2 cups chopped Romaine lettuce, 1 cup Caesar salad dressing, and 1/2 cup shredded Parmesan cheese. Toss gently to coat the lettuce without wilting it.
- Lay the warmed tortillas flat on a clean surface. Divide the Caesar salad mixture evenly between the two tortillas, placing it slightly off-center so there’s room to fold.
- Top each salad portion with 6 grilled shrimp. Add an extra sprinkle of Parmesan or a crack of black pepper if desired.
- Roll the tortillas tightly, tucking the ends in as you go to secure the fillings. Slice each wrap in half on a diagonal for easy serving.
- Serve immediately with lemon wedges on the side for a zesty finish.
What to Serve With
- Crispy baked sweet potato fries or classic French fries for a comforting side.
- A light tomato and cucumber salad dressed with olive oil and red wine vinegar to add freshness.
- A crisp glass of Sauvignon Blanc or a citrusy iced tea to complement the shrimp’s brightness.
- Extra Caesar dressing or a lemon-garlic aioli for dipping if you like more sauce.
- Pickled vegetables or a quick coleslaw to introduce tang and crunch.
Top Tips for Perfecting
- Substitute plain Greek yogurt for half the Caesar dressing to lighten the sauce without losing creaminess.
- If shrimp size varies, cook until shrimp reach an internal temperature of 120–125°F for the most tender results; avoid overcooking to prevent rubbery shrimp.
- For extra smoky flavor, finish shrimp with a squeeze of lemon before serving.
- Want a gluten-free option? Use corn or gluten-free tortillas and check your Caesar dressing labels.
- Avoid overdressing the lettuce; too much dressing makes wraps soggy. Toss lightly and assemble just before serving.
Storing and Reheating Tips
- Refrigeration: Store assembled wraps in an airtight container for up to 24 hours; they’re best eaten the same day to keep tortillas from getting soggy. If storing components separately, keep grilled shrimp and dressed lettuce in separate containers for up to 2 days.
- Freezing: Not recommended for assembled wraps—the tortilla texture and lettuce quality suffer. You can freeze raw or cooked shrimp separately (uncooked is best for quality) for up to 3 months.
- Reheating: Reheat shrimp gently in a skillet over low heat or in a warm oven (300°F) for a few minutes to avoid drying out. If possible, reassemble with fresh lettuce and dressing after reheating.
FAQs
Can I use frozen shrimp for this recipe?
Yes. Thaw frozen shrimp completely in the refrigerator or under cold running water, then pat dry before seasoning and grilling to ensure even cooking.
Can I make these ahead of time for a party?
You can grill shrimp ahead and keep them warm in a low oven. Assemble wraps just before serving to prevent sogginess, or lay out components for a build-your-own wrap station.
What if I don’t have a grill or grill pan?
A regular skillet or cast-iron pan works well. Cook shrimp over medium-high heat for the same timing until they are pink and opaque.
How do I keep the wraps from falling apart?
Roll tightly and tuck the ends under. You can secure each wrap with a toothpick when serving to help maintain shape.
Is there a dairy-free version?
Yes. Use a dairy-free Caesar dressing and omit the Parmesan or use a dairy-free Parmesan alternative to keep the creamy flavor without dairy.
Conclusion
These Grilled Shrimp Caesar Wraps are an easy, flavorful meal that proves quick cooking can still be impressive. They’re perfect for weeknights, packed lunches, or casual entertaining, and they bring together creamy dressing, crisp romaine, and juicy grilled shrimp in every portable bite. If you want variations or inspiration from other cooks, check out this flavorful take on a blackened twist with the Blackstone Blackened Shrimp Caesar Wrap – Or Whatever You Do or a more traditional version at Grilled Shrimp Caesar Wraps Recipe. Give the recipe a try, share it with friends, and enjoy the simplicity and deliciousness of a great homemade wrap.

Grilled Shrimp Caesar Wraps
Equipment
- Grill or Grill Pan
- Mixing Bowl
Ingredients
Ingredients
- 12 large shrimp, peeled and deveined tails removed if preferred
- 2 large flour tortillas warmed
- 1 cup Caesar salad dressing chilled
- 2 cups Romaine lettuce washed and chopped
- 1/2 cup shredded Parmesan cheese finely shredded
- 1 tbsp olive oil extra virgin if available
- 1/2 tsp garlic powder
- Salt and pepper to taste, freshly cracked pepper recommended
- Lemon wedges for serving, cut into quarters
Instructions
- Preheat your grill or grill pan over medium-high heat until hot and lightly oiled.
- Pat the shrimp dry with paper towels. In a bowl, toss shrimp with olive oil, garlic powder, and a generous pinch of salt and pepper until evenly coated.
- Arrange the shrimp on the preheated grill or grill pan in a single layer. Cook for 2 to 3 minutes on the first side without moving them, until grill marks appear and shrimp begin to turn pink.
- Flip the shrimp and cook another 2 to 3 minutes until opaque and cooked through. Remove from heat and set aside to rest briefly.
- In a large bowl, combine chopped Romaine lettuce, Caesar salad dressing, and shredded Parmesan cheese. Toss gently to coat the lettuce without wilting it.
- Lay the warmed tortillas flat on a clean surface. Divide the Caesar salad mixture evenly between the two tortillas, placing it slightly off-center so there’s room to fold.
- Top each salad portion with grilled shrimp. Add an extra sprinkle of Parmesan or a crack of black pepper if desired.
- Roll the tortillas tightly, tucking the ends in as you go to secure the fillings. Slice each wrap in half on a diagonal for easy serving.
- Serve immediately with lemon wedges on the side for a zesty finish.