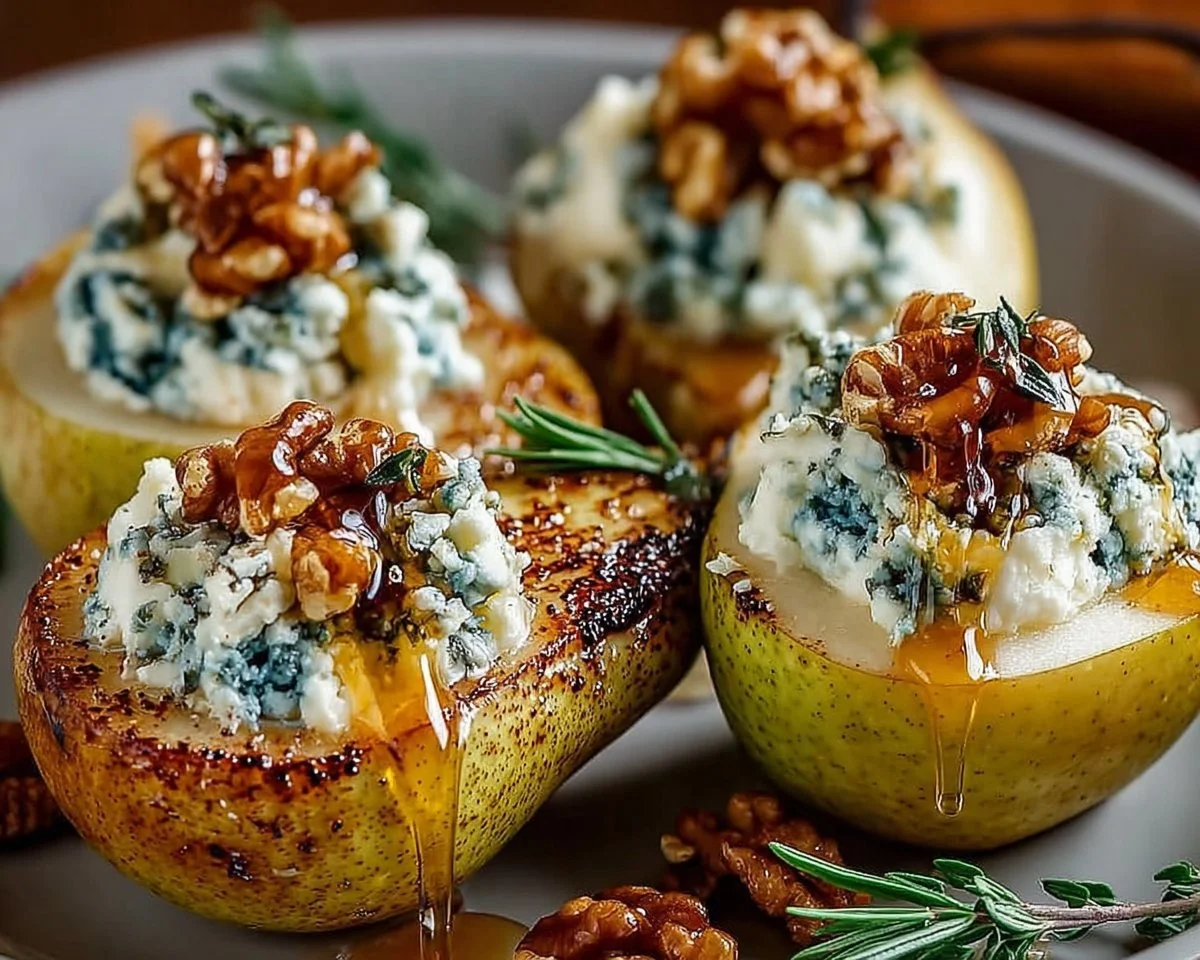
Creamy, juicy, and sweet with a punch of savory blue cheese — Blue Cheese Stuffed Pears are a tiny bite of culinary magic that feels both indulgent and effortless. This recipe brings together soft roasted pears, tangy blue cheese, crunchy walnuts, and a drizzle of honey for a simple appetizer or elegant dessert that takes minutes to prepare and steals the show at dinner parties. Fun fact: pairing fruit and cheese goes back centuries, and pears were once considered a luxury fruit in European courts.
This recipe is special because it requires minimal hands-on time yet delivers flavors that feel complex and refined. It’s simple enough for weeknights, quick enough for last-minute guests, and family-friendly when you swap blue cheese for milder goat cheese for kids. If you enjoy other variations, you can also explore our Blue Cheese Stuffed Pears recipe on RecipesFiber for another take. Ready to try something impressive with just a handful of ingredients? Let’s get cooking — you’ll love how rewarding this small recipe is.
What is Blue Cheese Stuffed Pears?
What’s in a name? Blue Cheese Stuffed Pears sounds like a fancy hotel canapé, but it’s really a playful mash-up of sweet fruit and salty, creamy cheese. Who decided to put blue cheese in a pear anyway — was it genius or pure curiosity? The result proves that the oddest flavor marriages often work best. After a short roast, the pear becomes meltingly tender and the blue cheese softens into a savory custard that balances the fruit’s natural sugars. Someone might jokingly say “the way to a man’s heart is through his stomach,” and after one bite of these, you’ll probably agree that hearts (and stomachs) are easily won. Give them a try and see who you impress first.
Why You’ll Love This
- Bold contrast of flavors: The first thing you’ll notice is the contrast — the soft, honeyed pear against the tangy, creamy blue cheese and toasty walnuts. Each bite is a sweet-and-savory symphony that hits multiple taste receptors and keeps you reaching for more.
- Budget-friendly and homemade: Making this at home is far cheaper than ordering a similar appetizer at a restaurant, and you control the quality of ingredients. A small amount of blue cheese goes a long way, and pears are affordable when in season.
- Easy upgrades and toppings: This recipe is a perfect canvas — drizzle with honey, sprinkle extra thyme, or add a handful of arugula for peppery freshness. If you like contrast-forward dishes, consider pairing it with other recipes like a flaky pastry or light salad for a complete spread.
If you love the crisp-sweet and creamy combo, try pairing it with other fruity desserts or pastries featured on the blog to keep exploring textures and flavors. Now go get those pears!
How to Make:
Quick Overview
This recipe is easy and fast: minimal prep, quick bake, and terrific results. Preparation is mostly about halving and coring pears and mixing the filling. The pears become tender and juicy while the blue cheese melts into a rich, slightly tangy filling. Expect about 10 minutes of prep and 15–20 minutes in the oven for a total time of roughly 30 minutes.
Ingredients
2 ripe pears (halved and cored, choose Bosc or Anjou for firmness)
1/4 cup blue cheese (crumbled)
2 tablespoons walnuts (chopped)
1 tablespoon honey (plus extra for drizzling)
1 teaspoon fresh thyme leaves (lightly crushed)
Directions
- Preheat the oven to 350°F (175°C). Line a baking sheet with parchment paper or lightly grease it to prevent sticking.
- Cut the pears in half lengthwise and use a spoon to scoop out the core and seeds, creating a small cavity in each half. Keep the pear halves as even as possible for uniform baking.
- In a small bowl, gently mix the crumbled blue cheese, chopped walnuts, honey, and fresh thyme until the mixture holds together slightly but still looks rustic. Taste and add a touch more honey if you prefer sweeter.
- Spoon the cheese mixture into the cavity of each pear half, pressing lightly so it stays in place. Don’t overpack — the cheese will soften and spread as it bakes.
- Arrange the stuffed pears cut side up on the prepared baking sheet and bake for 15–20 minutes, or until the pears are tender when pierced with a fork and the cheese is melted and slightly golden. Keep an eye after 15 minutes to avoid over-softening.
- Remove from the oven and let cool for 3–5 minutes. Transfer to a serving plate, drizzle with extra honey if desired, and serve warm. Enjoy!
What to Serve With:
- Fresh arugula or baby spinach salad tossed with a light vinaigrette to add peppery freshness.
- Crisp prosciutto or thinly sliced cured ham for an elegant savory bite.
- Toasted baguette slices or crostini for scooping up the melted cheese and pear juices.
- A light white wine like Sauvignon Blanc or a sparkling Prosecco to cut through the richness.
- If you want a sweeter side, serve alongside a creamy pastry or roll; for contrast, try our Blueberry Cheesecake Rolls for a delightful sweet pairing.
Top Tips for Perfecting:
- Choose pears that are ripe but still firm. Overripe pears will become too mushy in the oven.
- Swap blue cheese for goat cheese or cream cheese if you prefer a milder flavor — the texture will stay creamy.
- Toast the walnuts lightly in a dry pan for 2–3 minutes before chopping to amplify the nutty flavor.
- If you want a crisper finish, broil for 30–60 seconds at the end, watching carefully to prevent burning.
- Avoid overstuffing the pears; the filling softens and spreads while baking.
- For a savory twist, add a pinch of black pepper or a few crushed red pepper flakes to the filling.
Storing and Reheating Tips:
Refrigeration: Store leftover stuffed pears in an airtight container in the refrigerator for up to 2–3 days. They’re best eaten within 24 hours for optimal texture.
Freezing: Freezing is not recommended because the pear’s texture changes significantly once thawed. If you must freeze, separate pears from any fresh toppings and expect some texture loss.
Reheating: Reheat in a 325°F (160°C) oven for 6–8 minutes until warmed through. Avoid the microwave when possible, as it can make the pears watery and the cheese grainy. For best results, reheat on a baking sheet to revive the edges slightly.
FAQs
Can I use a different cheese instead of blue cheese?
Yes — goat cheese, cream cheese, or a mild gorgonzola are excellent substitutions. Goat cheese gives a tangy creaminess that kids often enjoy.
What type of pear is best for stuffing and roasting?
Bosc and Anjou hold their shape well when baked. Choose pears that are ripe but still firm to the touch.
Can I prepare these ahead of time?
You can prep the pears and filling a few hours ahead and refrigerate separately. Stuff and bake just before serving for the best texture.
How do I make this nut-free?
Omit the walnuts or replace them with toasted pumpkin seeds for crunch. The dish still works beautifully without nuts.
Are these suitable as a dessert or an appetizer?
Both — serve them warm as a fancy appetizer or top with a dollop of whipped cream or mascarpone and extra honey for a rustic dessert.
Conclusion
Blue Cheese Stuffed Pears are an easy yet impressive dish that brings together sweet, savory, creamy, and crunchy elements in a way that feels upscale but is wonderfully simple to make. Whether you’re looking for a quick appetizer for friends or an elegant dessert for a cozy dinner, this recipe delivers bold flavors with minimal fuss. If you’d like an alternate inspiration or original source ideas, check out Blue Cheese Stuffed Pears – holisticfoodie.com for further reading and variations. Give these a try and share them at your next gathering — they’re guaranteed to spark compliments.

Blue Cheese Stuffed Pears
Equipment
- Baking Sheet
- Parchment Paper
- Mixing Bowl
- Spoon
Ingredients
Ingredients
- 2 pieces Ripe Pears (Bosc or Anjou, halved and cored)
- 1/4 cup Blue Cheese (crumbled)
- 2 tablespoons Walnuts (chopped)
- 1 tablespoon Honey plus extra for drizzling
- 1 teaspoon Fresh Thyme Leaves (lightly crushed)
Instructions
- Preheat the oven to 350°F (175°C). Line a baking sheet with parchment paper or lightly grease it to prevent sticking.
- Cut the pears in half lengthwise and use a spoon to scoop out the core and seeds, creating a small cavity in each half.
- In a small bowl, gently mix the crumbled blue cheese, chopped walnuts, honey, and fresh thyme until the mixture holds together slightly but still looks rustic.
- Spoon the cheese mixture into the cavity of each pear half, pressing lightly so it stays in place.
- Arrange the stuffed pears cut side up on the prepared baking sheet and bake for 15–20 minutes, or until the pears are tender when pierced with a fork and the cheese is melted and slightly golden.
- Remove from the oven and let cool for 3–5 minutes. Transfer to a serving plate, drizzle with extra honey if desired, and serve warm.