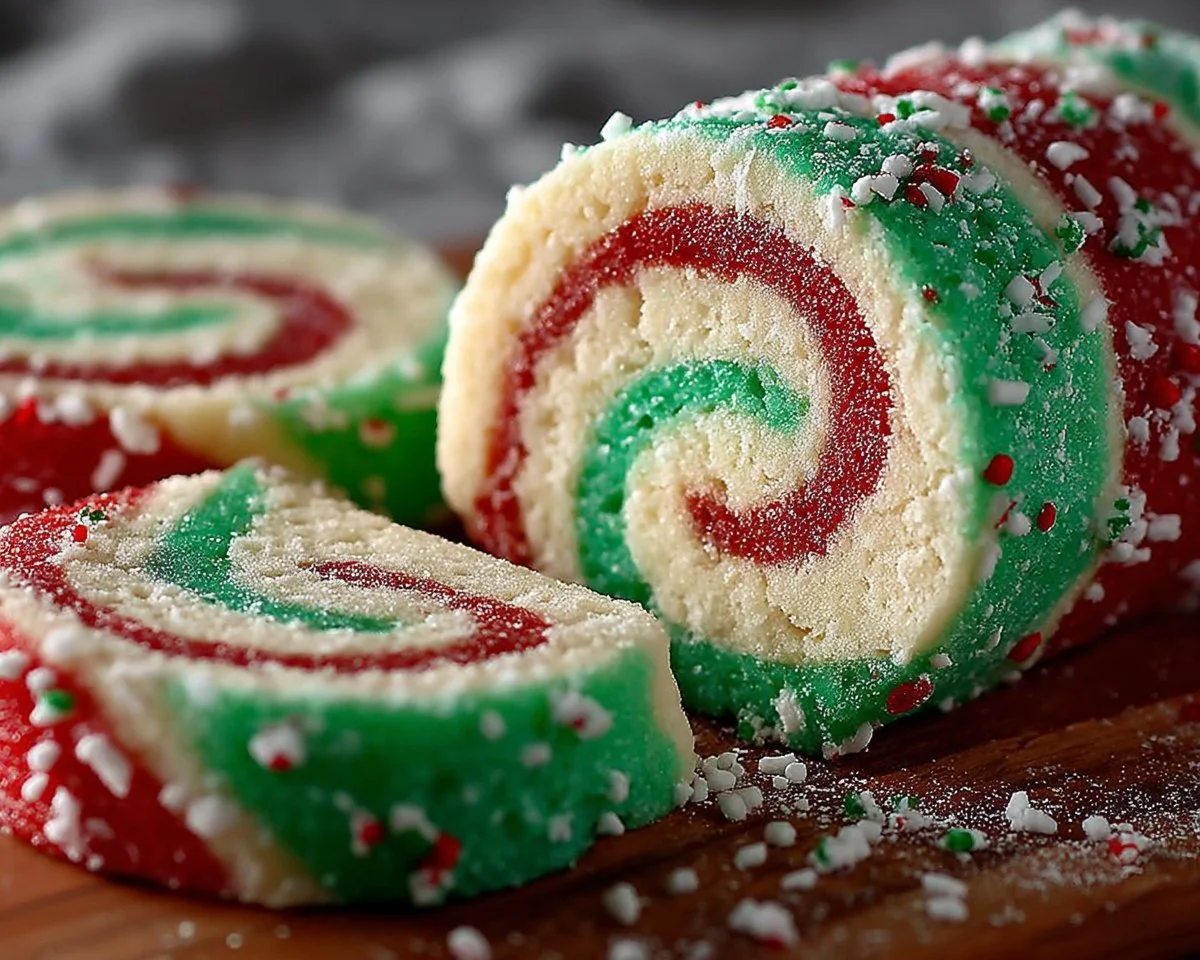
Creamy, buttery, and delightfully festive — these Christmas Pinwheel Cookies are the kind of treat that makes winter mornings feel like a warm hug. With swirls of red and green dough, they look like they belong on the center of the holiday cookie plate and taste just as joyful as they appear. Fun fact: pinwheel cookies were a Victorian-era favorite because their spiral pattern was seen as fancy without being fussy.
This recipe is special because it’s both simple and impressive: a straightforward dough, a quick color twist, and you end up with perfectly uniform cookies that are great for gifting. Preparation is quick if you plan ahead, and these cookies are truly family-friendly — kids can help roll, slice, and decorate. If you like festive cookie collections, you might also enjoy my roundup of seasonal favorites found at Christmas pinwheel cookies inspiration, which pairs nicely with this classic. Get ready to bake something that looks store-bought but tastes homemade — and is a whole lot more fun.
What is Christmas Pinwheel Cookies?
Why are they called pinwheel cookies? Imagine rolling two thin layers of dough together like a tiny pastry tornado — isn’t that whimsical? The spiral resembles an old-fashioned pinwheel toy, and yes, someone somewhere thought it clever to bake playthings into treats. Did the name come from holiday pinwheels blowing in the snow, or a baker’s playful mood? Who knows — but any cookie that makes you smile gets a good story.
They’re festive, portable, and irresistibly charming. And remember, “the way to a man’s heart is through his stomach.” Why not test that theory with a plate of these swirly delights? Give them a try and see how fast they disappear — trust me, you’ll want to share the recipe.
Why You’ll Love This:
These cookies are irresistible for three big reasons:
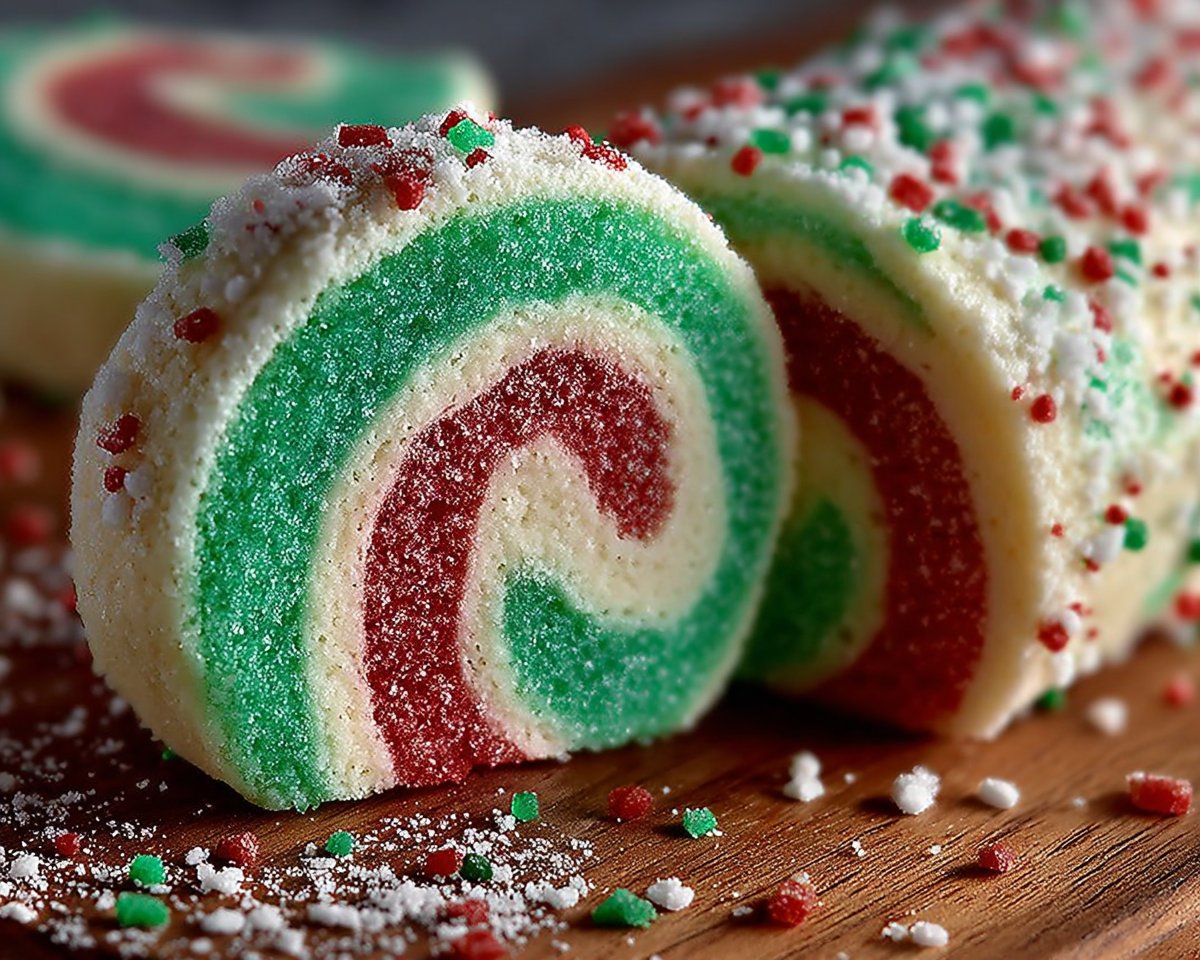
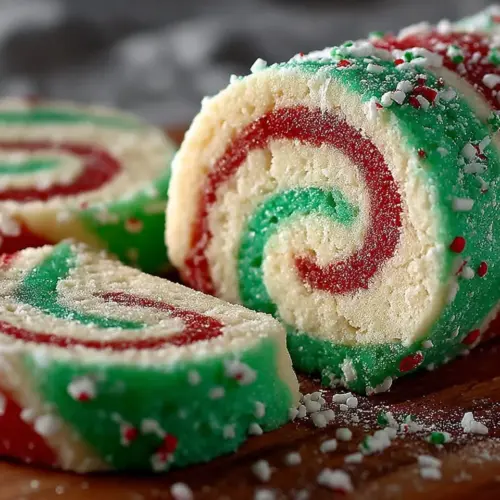
- Visual wow factor: The contrasting red and green swirls make every cookie look festive and professionally made, while the buttery crumb melts in your mouth.
- Budget-friendly baking: Making them at home costs far less than buying specialty holiday cookies, and a single batch yields dozens of cookies to share or freeze.
- Flavor simplicity with a twist: Classic vanilla-scented dough gets the holiday treatment with playful colors and optional sprinkles or a light glaze.
Compared to a simple sugar cookie recipe, these pinwheels offer more visual flair without extra hassle, making them a lovely companion to other cookie favorites like those listed in the 20 Must-Make Christmas Cookies roundup. Make a batch for holiday parties, cookie exchanges, or to brighten a weekday lunchbox.
How to Make:
Quick Overview
This recipe is easy because the dough is forgiving and the steps are straightforward. You’ll enjoy a tender, slightly crisp edge with a soft center — the perfect cookie contrast. Standout elements include the rich, buttery flavor and the clean spiral pattern that slices into neat rounds. Prep time is about 25 minutes active, plus 2 hours chilling; baking is 10–12 minutes per sheet.
Ingredients
- 2 cups all-purpose flour, spooned and leveled
- 1/2 teaspoon baking powder
- 1/4 teaspoon salt
- 2/3 cup powdered sugar (confectioners’ sugar), sifted
- 1/4 cup granulated sugar
- 2.5 sticks unsalted butter (about 1 1/4 cups), room temperature
- 1 teaspoon vanilla extract
- Food coloring: red and green gel or liquid, as needed
Directions
- In a medium bowl, whisk together 2 cups flour, 1/2 teaspoon baking powder, and 1/4 teaspoon salt until evenly combined. Set aside.
- In a separate large bowl, beat 2.5 sticks unsalted butter (room temperature), 2/3 cup powdered sugar, and 1/4 cup granulated sugar with an electric mixer on medium speed for 2–3 minutes until light and creamy. Scrape down the sides as needed.
- Add 1 teaspoon vanilla extract and mix for another 30 seconds to incorporate flavor evenly.
- Gradually add the dry ingredient mixture to the butter mixture, mixing on low until a soft dough forms. Do not overmix — stop when the flour disappears.
- Divide the dough into two equal portions. Place each portion on separate pieces of parchment. Add a few drops of red food coloring to one portion and green to the other, kneading gently until color is uniform. Add more coloring a drop at a time for vibrant hues.
- Roll out each colored dough between parchment sheets to about 1/8-inch thickness, making two rectangles of similar size. Carefully lift and layer the green dough on top of the red dough (or vice versa).
- Starting at one short side, tightly roll the layered dough into a log. Press the seam gently to seal. Wrap the log tightly in plastic wrap and refrigerate for at least 2 hours, or until firm.
- When chilled, preheat your oven to 350°F (175°C). Unwrap the log and slice into 1/4-inch rounds using a sharp knife. If the log softens, chill briefly between slices.
- Arrange the cookie rounds on a lined baking sheet about 1 inch apart. Bake for 10–12 minutes, or until the edges are just golden — watch closely so the centers stay pale.
- Transfer cookies to a wire rack to cool completely before serving. Cooling helps the swirls set and keeps the edges crisp.
What to Serve With:
- A glass of cold milk or a hot cup of cocoa for classic holiday pairing.
- Spiced tea or mulled cider to complement the buttery sweetness.
- A simple peppermint glaze or white chocolate drizzle for extra festive flair.
- Cheese board with mild cheeses and dried fruit for a sweet-and-savory holiday spread.
Top Tips for Perfecting:
- Use room-temperature butter for smooth creaming; cold butter makes dough lumpy.
- Gel food coloring gives stronger color without adding liquid; use sparingly.
- Roll dough evenly for neat, consistent spirals; parchment makes transfer easy.
- Chill thoroughly — a cold log slices cleanly and keeps shapes intact during baking.
- If you want flavored twists, swap vanilla for almond or orange extract (use sparingly).
Storing and Reheating Tips:
- Store cookies in an airtight container at room temperature for up to 5 days.
- Freeze baked cookies in a single layer on a tray, then transfer to a freezer bag for up to 3 months.
- To thaw frozen cookies, leave at room temperature for 30–60 minutes; warm briefly in a 300°F oven for 3–5 minutes if you prefer them slightly warm.
- Dough logs can be wrapped and frozen for up to 2 months — slice from frozen and add an extra minute to baking time.
FAQs
Can I use butter substitutes or margarine?
Butter gives the best flavor and texture; margarine may make the dough softer and spread more. If needed, use a high-quality butter substitute and chill the dough well.
How do I get bright, even colors?
Use gel food coloring and knead evenly. If color streaks remain, fold and knead gently until uniform.
Can I make this dough ahead of time?
Yes — dough logs can be made and refrigerated for 2–3 days or frozen for up to 2 months. Slice and bake directly from chilled or slightly thawed logs.
Why did my cookies spread too much?
Over-soft dough, warm oven, or not chilling the log can cause spreading. Chill the log thoroughly and bake at the correct temperature.
Can I add sprinkles or sugar on top?
Yes — press sprinkles or a light dusting of sanding sugar on the slices before baking for extra sparkle. Avoid heavy toppings that may weigh the cookies down.
Conclusion
These Christmas Pinwheel Cookies are a festive, simple, and family-friendly recipe that delivers big on holiday cheer with minimal fuss. The buttery dough, colorful spiral, and easy preparation make them perfect for cookie swaps, school parties, or a cozy night in baking with loved ones. If you want another take on the classic pinwheel or inspiration from a time-tested version, check out this excellent resource: Christmas Pinwheel Cookies – SugarHero. Give them a try, share a batch, and enjoy the smiles that follow.
Christmas Pinwheel Cookies
Equipment
- Mixing Bowl
- Electric Mixer
- Parchment Paper
- Baking Sheet
- Wire Rack
Ingredients
Dry Ingredients
- 2 cups All-purpose flour spooned and leveled
- 1/2 teaspoon Baking powder
- 1/4 teaspoon Salt
Wet Ingredients
- 2/3 cup Powdered sugar sifted
- 1/4 cup Granulated sugar
- 2.5 sticks Unsalted butter room temperature
- 1 teaspoon Vanilla extract
Coloring
- Food coloring red and green gel or liquid, as needed
Instructions
- In a medium bowl, whisk together flour, baking powder, and salt until evenly combined. Set aside.
- In a separate large bowl, beat butter, powdered sugar, and granulated sugar with an electric mixer on medium speed for 2–3 minutes until light and creamy. Scrape down the sides as needed.
- Add vanilla extract and mix for another 30 seconds to incorporate flavor evenly.
- Gradually add the dry ingredient mixture to the butter mixture, mixing on low until a soft dough forms. Do not overmix — stop when the flour disappears.
- Divide the dough into two equal portions. Place each portion on separate pieces of parchment. Add a few drops of red food coloring to one portion and green to the other, kneading gently until color is uniform.
- Roll out each colored dough between parchment sheets to about 1/8-inch thickness, making two rectangles of similar size. Carefully lift and layer the green dough on top of the red dough (or vice versa).
- Starting at one short side, tightly roll the layered dough into a log. Press the seam gently to seal. Wrap the log tightly in plastic wrap and refrigerate for at least 2 hours, or until firm.
- When chilled, preheat your oven to 350°F (175°C). Unwrap the log and slice into 1/4-inch rounds using a sharp knife. If the log softens, chill briefly between slices.
- Arrange the cookie rounds on a lined baking sheet about 1 inch apart. Bake for 10–12 minutes, or until the edges are just golden — watch closely so the centers stay pale.
- Transfer cookies to a wire rack to cool completely before serving. Cooling helps the swirls set and keeps the edges crisp.
2 comments
1
@@AG4tM