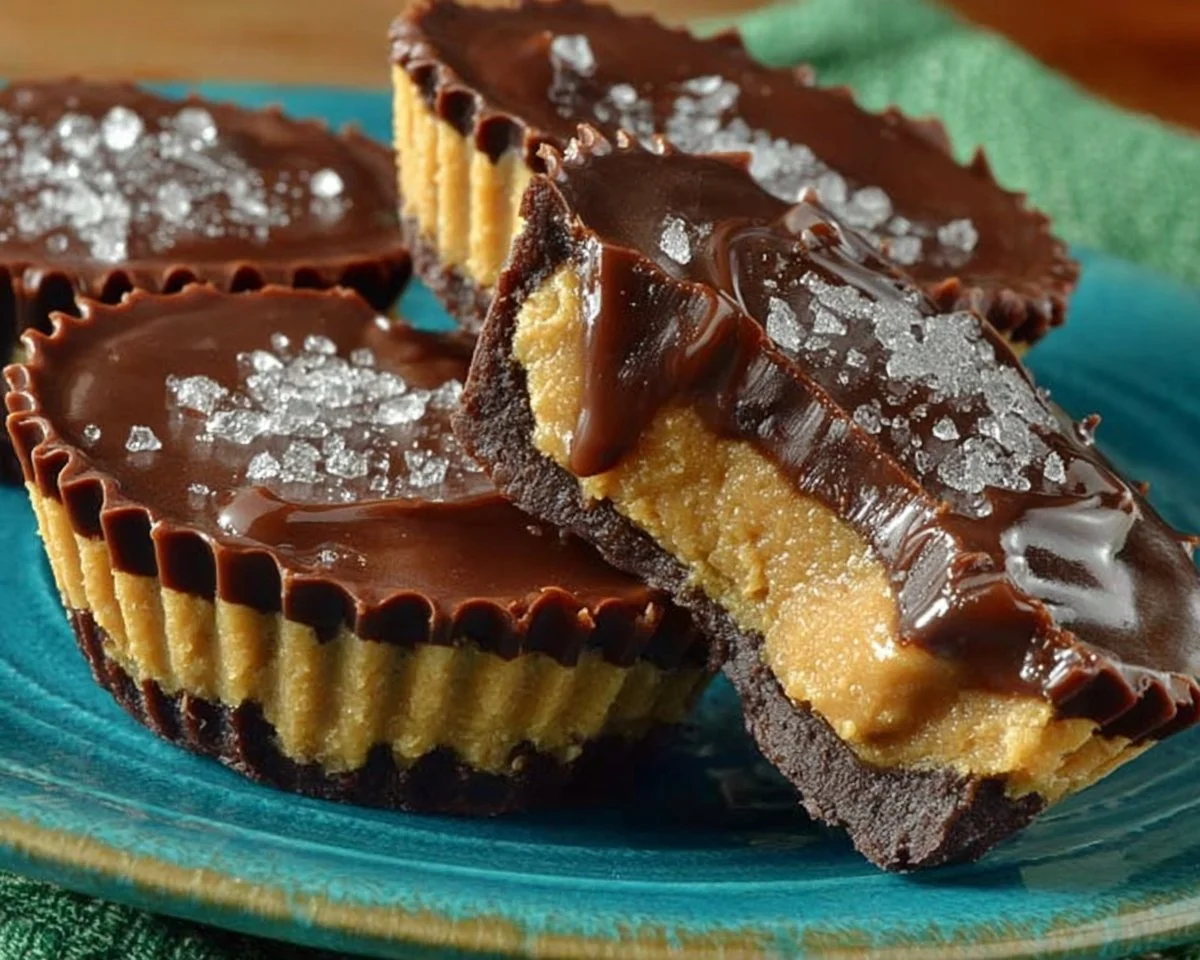
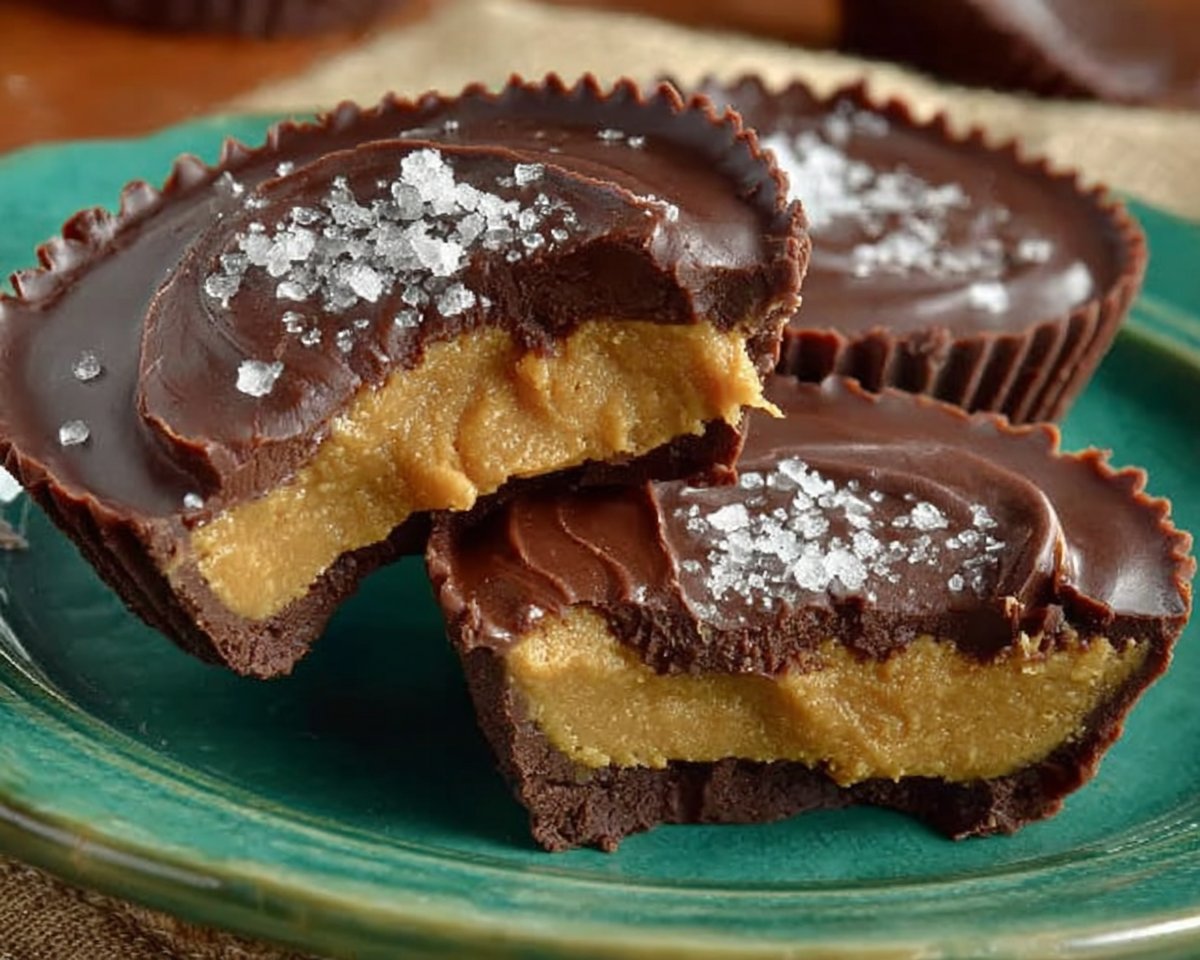
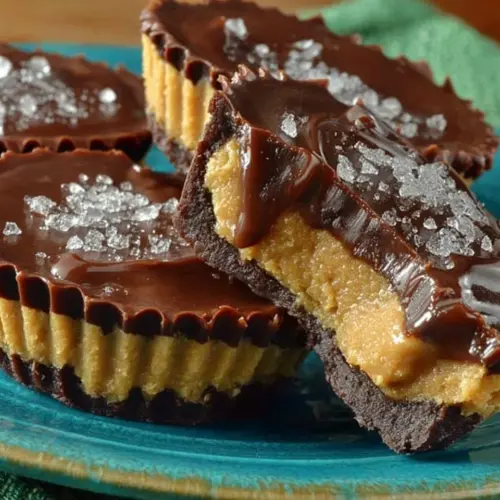
Creamy, chocolatey, and perfectly portioned — these Homemade Peanut Butter Cups are comfort candy at its finest. Imagine a smooth, sweet peanut butter center wrapped in glossy semi-sweet chocolate: bite one and you’ve got crunchy nostalgia and rich indulgence in every mouthful. Fun fact: homemade peanut butter cups often taste fresher than store-bought because you control the salt and chocolate quality — and you can make them just how your family likes. If you enjoy quick, rewarding desserts, this recipe is special because it’s simple, fast to prepare, and loved by kids and adults alike. For another peanut butter treat that’s just as fun, see our detailed full guide to Homemade Peanut Butter Cups. Ready to make something everyone will fight over? Let’s get started!
What is Homemade Peanut Butter Cups?
What exactly are homemade peanut butter cups? Think of them as tiny, elegant candy cups filled with a dreamy peanut butter filling and encased in chocolate — like miniature treasure chests you can eat. Why the name? Because they’re literally little cups of peanut butter. Who named them? Maybe a chocolate-loving inventor with a sweet sense of humor. Do they win hearts? Absolutely — after all, the way to a man’s heart is through his stomach. Serve them at parties, tuck them into lunchboxes, or keep a secret stash in the freezer. Curious yet? Try this recipe and find out why one bite feels like a celebratory hug.
Why You’ll Love This
First, the main highlight is the contrast: silky peanut butter center and snap of chocolate create irresistible texture and flavor. Second, making them at home saves money — quality chocolate and pantry staples cost less per cup than store-bought premium candies and you avoid unnecessary preservatives. Third, the toppings and variations (sea salt flakes, chopped peanuts, drizzle of caramel) make each batch feel gourmet. Compared to our chocolate peanut butter rice krispie cups, these are denser and richer, perfect when you want a pure chocolate-peanut punch. If you like easy, tasty snacks that deliver big on flavor, this recipe will become a staple. Go on — make a batch and share the love.
How to Make
Quick Overview
This recipe is delightfully simple: a smooth peanut butter filling meets melted chocolate in a quick assembly that needs short freezing time to set. Preparation time is about 10 minutes, assembly 10–15 minutes, plus 30 minutes to firm up in the freezer. The result is creamy, slightly sweet filling with a glossy chocolate shell that snaps when you bite it.
Ingredients
1 cup creamy peanut butter, room temperature
1/4 cup unsalted butter, melted
1/4 cup powdered sugar, sifted if lumpy
1/2 teaspoon vanilla extract
2 cups semi-sweet chocolate chips
1 tablespoon coconut oil
Directions
- Prepare the Peanut Butter Filling: In a medium mixing bowl, combine 1 cup creamy peanut butter, 1/4 cup melted unsalted butter, 1/4 cup powdered sugar, and 1/2 teaspoon vanilla extract. Stir with a spoon or rubber spatula until the mixture is completely smooth and well blended. The filling should hold its shape but be easy to spoon. Set the bowl aside while you melt the chocolate.
- Melt the Chocolate: In a microwave-safe bowl, combine 2 cups semi-sweet chocolate chips and 1 tablespoon coconut oil. Microwave on high in 30-second intervals, stirring well between each interval to avoid scorching. Continue until the chocolate is fully melted and glossy. Alternatively, use a double boiler over simmering water and stir until smooth.
- Assemble the Peanut Butter Cups: Line a muffin tin with paper cupcake liners. Spoon about 1 tablespoon of melted chocolate into the bottom of each liner and gently swirl to cover the bottom evenly. Place the tin in the freezer for about 10 minutes to set the base. Remove the tin and add a heaping teaspoon or small spoonful of the peanut butter mixture on top of each chocolate base, gently pressing and smoothing so the peanut butter layer is even but not overflowing. Spoon another tablespoon of melted chocolate over the peanut butter layer, using the back of the spoon to seal the edges. Tap the tin lightly on the counter to remove air bubbles.
- Final Setting: Return the assembled muffin tin to the freezer and chill for another 20 to 30 minutes until firm to the touch. When set, remove the peanut butter cups from the paper liners and store them in an airtight container. Keep them chilled for the best texture.
What to Serve With
These peanut butter cups are decadent enough to enjoy on their own, but they also pair beautifully with:
- A cold glass of milk or oat milk for classic comfort
- Fresh berries or an orange slice to cut through the richness
- Coffee or espresso for an after-dinner treat
- Ice cream sundaes as a crunchy, chocolatey topper
- Salted nuts or pretzels on the side to echo the sweet-salty contrast
Top Tips for Perfecting
- Ingredient substitutions: Use natural peanut butter for a more pronounced nutty flavor, but reduce added salt if your peanut butter is salted. For vegan cups, swap butter for coconut oil in the filling and use dairy-free chocolate chips.
- Timing adjustments: Freeze the base for 12 minutes if your freezer is slow — the goal is a firm chocolate layer before adding the filling.
- Flavor enhancements: Add a pinch of flaky sea salt on top of each cup before the chocolate fully sets, or fold in a tablespoon of mini chocolate chips into the peanut butter for texture.
- Common mistakes to avoid: Don’t overheat chocolate — stir often and use short microwave bursts. Avoid a runny filling by keeping peanut butter at room temperature, not warm.
- Uniform cups: Use a small cookie scoop for even filling portions and a piping bag for neater assembly when covering the peanut butter with the final chocolate layer.
For another twist on chocolate-and-peanut treats, you might like our crunchy rice krispie version — it’s an easy variation with additional texture and fun for kids and adults alike: Chocolate Peanut Butter Rice Krispie Cups
Storing and Reheating Tips
- Refrigeration: Store your peanut butter cups in an airtight container in the refrigerator for up to 2 weeks. Layer parchment paper between layers to prevent sticking.
- Freezing: For longer storage, freeze in a single layer until firm, then stack with parchment between layers in a freezer-safe container. They keep well for up to 3 months. Thaw in the refrigerator for an hour before serving to maintain texture.
- Room temperature: If your kitchen is cool (under 70°F / 21°C), you can keep them at room temperature for a day or two; otherwise, store in the fridge to avoid melting.
- Reheating: These are best eaten chilled. If you prefer softer centers, let them sit at room temperature for 10–15 minutes before enjoying rather than using heat.
FAQs
Can I use crunchy peanut butter instead of creamy?
Yes. Crunchy peanut butter adds a pleasant texture to the filling. Use the same amount and mix until well combined; the finished cups will be slightly more textured.
Do I have to use coconut oil in the chocolate?
No, coconut oil helps make the chocolate glossy and easier to spread, but you can substitute a neutral oil like vegetable oil or leave it out; chocolate will be slightly firmer without it.
Can I make these nut-free?
You can. Substitute sunbutter (sunflower seed butter) for peanut butter and ensure all other ingredients are nut-free. The flavor will be different but still delicious.
How do I prevent the chocolate from cracking when I bite into it?
Allow the chocolate to set fully in the freezer for the recommended time. Using a small amount of coconut oil also helps create a smoother, less brittle shell.
Can I scale this recipe up for a party?
Absolutely. Multiply ingredients by batch size and work in stages: melt chocolate in larger bowls or use multiple bowls, and assemble on baking sheets for efficiency.
Conclusion
These Homemade Peanut Butter Cups are a quick, satisfying way to bring homemade candy to your kitchen table — rich, customizable, and perfect for gifting or stashing in the freezer. They’re easy enough for beginners and adaptable for experienced cooks who want to experiment with toppings and flavor twists. If you want inspiration from other home cooks, check out this classic version on Homemade Peanut Butter Cups – i am baker, or explore a slightly different take in this from-scratch guide at Homemade Peanut Butter Cups (From Scratch) – Fifteen Spatulas. Make a batch, share them with friends, and enjoy every chocolate-covered, peanut-buttery bite.
Homemade Peanut Butter Cups
Equipment
- Mixing Bowl
- Microwave-safe Bowl
- Muffin Tin
- Cupcake Liners
Ingredients
Ingredients
- 1 cup Creamy peanut butter Room temperature
- 1/4 cup Unsalted butter Melted
- 1/4 cup Powdered sugar Sifted if lumpy
- 1/2 teaspoon Vanilla extract
- 2 cups Semi-sweet chocolate chips
- 1 tablespoon Coconut oil
Instructions
- Prepare the Peanut Butter Filling: In a medium mixing bowl, combine creamy peanut butter, melted unsalted butter, powdered sugar, and vanilla extract. Stir until smooth and well blended. Set aside.
- Melt the Chocolate: In a microwave-safe bowl, combine semi-sweet chocolate chips and coconut oil. Microwave on high in 30-second intervals, stirring well between each interval until fully melted and glossy.
- Assemble the Peanut Butter Cups: Line a muffin tin with paper cupcake liners. Spoon about 1 tablespoon of melted chocolate into the bottom of each liner and swirl to cover. Freeze for about 10 minutes to set.
- Add the Peanut Butter Layer: Remove the tin and add a heaping teaspoon of the peanut butter mixture on top of each chocolate base, smoothing it out. Spoon another tablespoon of melted chocolate over the peanut butter layer and seal the edges.
- Final Setting: Return the muffin tin to the freezer and chill for another 20 to 30 minutes until firm. Remove from liners and store in an airtight container.
6 comments
1
-1′ OR 2+914-914-1=0+0+0+1 —
1-1; waitfor delay ‘0:0:15’ —
1-1 waitfor delay ‘0:0:15’ —
1MsVk6EFx’; waitfor delay ‘0:0:15’ —
@@160zK