
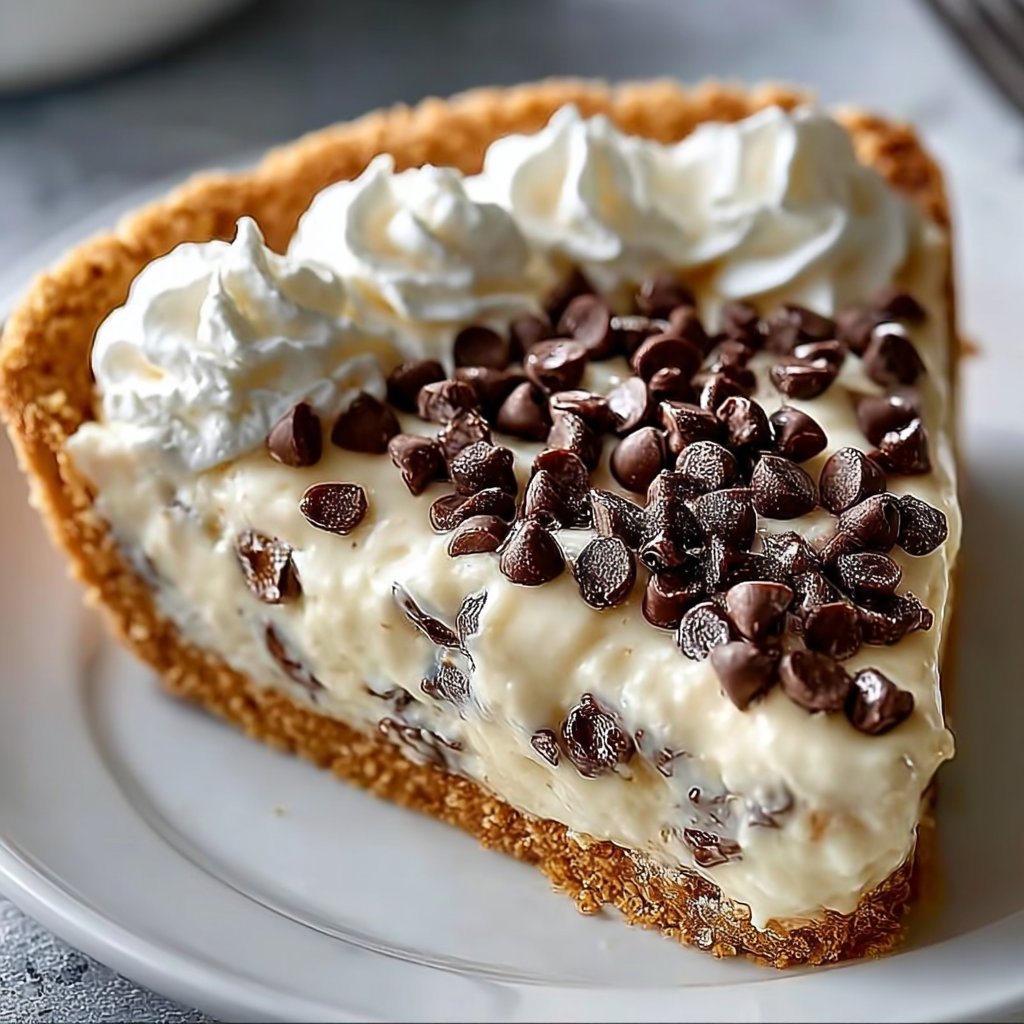
Cannoli Cream Pie – A No-Bake Dessert Dream
Creamy, dreamy, and impossibly simple, this Cannoli Cream Pie is the kind of no-bake dessert that becomes an instant favorite at family gatherings. Imagine a velvety filling that tastes like classic cannoli pastry cream folded with ricotta and mascarpone, studded with mini chocolate chips, all nestled in a crisp graham cracker crust — no oven required. Fun fact: traditional cannoli shells were originally fried and filled at the last minute so they stayed crunchy, which is why this pie gives you the best of both worlds — creamy center and crisp crust. If you love exploring sweet, fuss-free treats, check out more easy dessert recipes that make hosting a breeze. This pie is quick to assemble, family-approved, and perfect for potlucks or casual dessert nights.
What is Cannoli Cream Pie – A No-Bake Dessert Dream?
What’s in a name? Cannoli Cream Pie borrows all the best parts of a traditional Italian cannoli — ricotta-based cream, a touch of sweetness, and chocolate chips — but reimagines it as a chilled pie that’s easier to share. Why call it a cannoli pie? Maybe someone got tired of piping filling into fragile shells, or maybe they just wanted more filling than shell. Who doesn’t love an upgrade? And remember the old saying “the way to a man’s heart is through his stomach.” — this pie might just prove it. Try it and see why friends and family keep asking for seconds.
Why You’ll Love This
First, the highlight: the texture. The filling is luxuriously creamy with ricotta and mascarpone or cream cheese creating a smooth, slightly tangy base that plays beautifully against sweet mini chocolate chips. Second, cost-savings: making this at home is far cheaper than ordering specialty desserts from bakeries, and it uses pantry staples you may already have on hand. Third, flavor and finish: a dusting of cinnamon (optional) and the crunchy graham cracker crust make every bite satisfying and balanced. If you enjoy pie-style desserts, this is a lighter, no-bake alternative to heavier custard pies like pumpkin or baked cheesecakes — it pairs nicely with other recipes on the blog for a full dessert lineup. Ready to give it a try? It’s a simple win for home bakers and beginners alike.
How to Make
Quick Overview
This recipe is straightforward and ideal for busy cooks: no baking, just mixing and chilling. The texture is creamy and scoopable, with bursts of chocolate in every bite. It’s the kind of dessert that tastes elegant without demanding a lot of hands-on time. Prep time is about 15 minutes and chilling time is a minimum of 4 hours, or overnight for the best set.
Ingredients
- 1 pre-made graham cracker pie crust
- 1 cup ricotta cheese, well-drained if very watery and at room temperature if possible
- 1 cup mascarpone or cream cheese, softened to room temperature
- 1/2 cup powdered sugar, sifted to avoid lumps
- 1 teaspoon vanilla extract
- 1/2 teaspoon cinnamon, optional
- 1 and 1/4 cups mini chocolate chips, divided (1 cup for folding into the filling, 1/4 cup for topping)
- Whipped topping for garnish, optional
Directions
- Before you begin, make sure the mascarpone or cream cheese is softened to room temperature so it blends smoothly. If your ricotta seems watery, drain it in a fine mesh sieve for 10–15 minutes and blot gently with paper towels.
- In a large bowl, add 1 cup ricotta cheese and 1 cup mascarpone or softened cream cheese. Use an electric mixer on medium speed (or a sturdy whisk if mixing by hand) to beat the cheeses together until smooth and creamy, about 1 to 2 minutes. Scrape down the sides as needed.
- Add 1/2 cup powdered sugar, 1 teaspoon vanilla extract, and 1/2 teaspoon cinnamon (if using). Continue beating until the mixture is fully combined and silky, another 30–60 seconds. Taste and adjust sweetness if desired.
- Gently fold in 1 cup of the mini chocolate chips using a spatula. Fold just until evenly distributed to avoid deflating the mixture.
- Spoon the filling into the pre-made graham cracker pie crust. Use an offset spatula or the back of a spoon to spread the filling evenly and smooth the top.
- Sprinkle the remaining 1/4 cup mini chocolate chips over the top for a pretty finish. Cover the pie loosely with plastic wrap.
- Chill in the refrigerator for at least 4 hours or overnight until the pie is fully set. Chilling overnight improves the texture and makes slices neater.
- When ready to serve, slice the pie with a sharp knife (dip the knife in hot water and wipe dry between cuts for cleaner slices). Garnish each slice with whipped topping if desired and enjoy cold.
What to Serve With
Pair this pie with lightly sweetened espresso or a rich cup of coffee to complement the chocolate chips and creamy filling. Fresh berries such as raspberries or strawberries add bright acidity and color. For a fuller dessert spread, serve alongside lemon bars or a small scoop of vanilla gelato. If you want something refreshing, a mint tea or sparkling water with a lemon wedge balances the richness nicely.
Top Tips for Perfecting
- Ingredient substitution: If you don’t have mascarpone, full-fat cream cheese works well; mascarpone gives a silkier, slightly richer finish.
- Texture tweak: For a lighter filling, fold 1 cup of whipped topping into the cheese mixture before adding the chocolate chips.
- Timing: Chill at least 4 hours; overnight is best for firm slices.
- Flavor boosts: Add a tablespoon of orange zest for a citrusy twist or a tablespoon of mini chopped pistachios on top for crunch.
- Avoid watery filling by draining ricotta and bringing cheeses to room temperature before mixing.
Storing and Reheating Tips
Store the pie covered in the refrigerator for up to 4 days. If you’d like to freeze individual slices, wrap them tightly in plastic wrap and place in an airtight container for up to 1 month; thaw overnight in the fridge before serving. This pie is best served chilled and does not require reheating. If the crust softens after refrigeration, let slices sit at room temperature for 10–15 minutes before serving to improve texture.
FAQs
Can I make this pie ahead of time?
Yes — make it the night before for best results. Chilling overnight helps the filling set and makes slicing neater.
Can I use low-fat ricotta or cream cheese?
You can, but the filling will be less rich and slightly lighter in texture. For the classic creamy mouthfeel, full-fat options are recommended.
Is mascarpone necessary?
No. Mascarpone offers a silky, indulgent texture, but cream cheese is a fine substitute and gives a slight tang.
Can I add other mix-ins besides chocolate chips?
Absolutely. Chopped candied orange peel, chopped pistachios, or mini toffee bits work well. Fold them in carefully to keep the texture airy.
How can I make the pie more kid-friendly?
Skip the cinnamon and add colorful sprinkles on top. You can also use white chocolate chips for a sweeter, more playful flavor.
Conclusion
This Cannoli Cream Pie is a no-fuss, no-bake dessert that delivers on flavor, texture, and crowd-pleasing charm — perfect for weeknight celebrations, potlucks, or an indulgent family dessert. Its simple ingredients and minimal prep make it approachable for beginner bakers while still impressive enough for guests. If you like exploring variations, you might enjoy comparing this take with other creative no-bake versions like the recipe at No-Bake Cannoli Cream Pie – Mother Thyme or the creamy option found at No-Bake Creamy Cannoli Pie Recipe. Give it a try, share it with friends and family, and enjoy the smiles that follow — this pie is simple, satisfying, and made for sharing.

Cannoli Cream Pie
Equipment
- Mixing Bowl
- Electric Mixer
- Spatula
- Pie Dish
Ingredients
Ingredients
- 1 each pre-made graham cracker pie crust
- 1 cup ricotta cheese well-drained if very watery and at room temperature
- 1 cup mascarpone or cream cheese softened to room temperature
- 1/2 cup powdered sugar sifted to avoid lumps
- 1 teaspoon vanilla extract
- 1/2 teaspoon cinnamon optional
- 1 and 1/4 cups mini chocolate chips divided (1 cup for filling, 1/4 cup for topping)
- to taste whipped topping for garnish, optional
Instructions
- Before you begin, make sure the mascarpone or cream cheese is softened to room temperature so it blends smoothly. If your ricotta seems watery, drain it in a fine mesh sieve for 10–15 minutes and blot gently with paper towels.
- In a large bowl, add 1 cup ricotta cheese and 1 cup mascarpone or softened cream cheese. Use an electric mixer on medium speed (or a sturdy whisk if mixing by hand) to beat the cheeses together until smooth and creamy, about 1 to 2 minutes. Scrape down the sides as needed.
- Add 1/2 cup powdered sugar, 1 teaspoon vanilla extract, and 1/2 teaspoon cinnamon (if using). Continue beating until the mixture is fully combined and silky, another 30–60 seconds. Taste and adjust sweetness if desired.
- Gently fold in 1 cup of the mini chocolate chips using a spatula. Fold just until evenly distributed to avoid deflating the mixture.
- Spoon the filling into the pre-made graham cracker pie crust. Use an offset spatula or the back of a spoon to spread the filling evenly and smooth the top.
- Sprinkle the remaining 1/4 cup mini chocolate chips over the top for a pretty finish. Cover the pie loosely with plastic wrap.
- Chill in the refrigerator for at least 4 hours or overnight until the pie is fully set. Chilling overnight improves the texture and makes slices neater.
- When ready to serve, slice the pie with a sharp knife (dip the knife in hot water and wipe dry between cuts for cleaner slices). Garnish each slice with whipped topping if desired and enjoy cold.