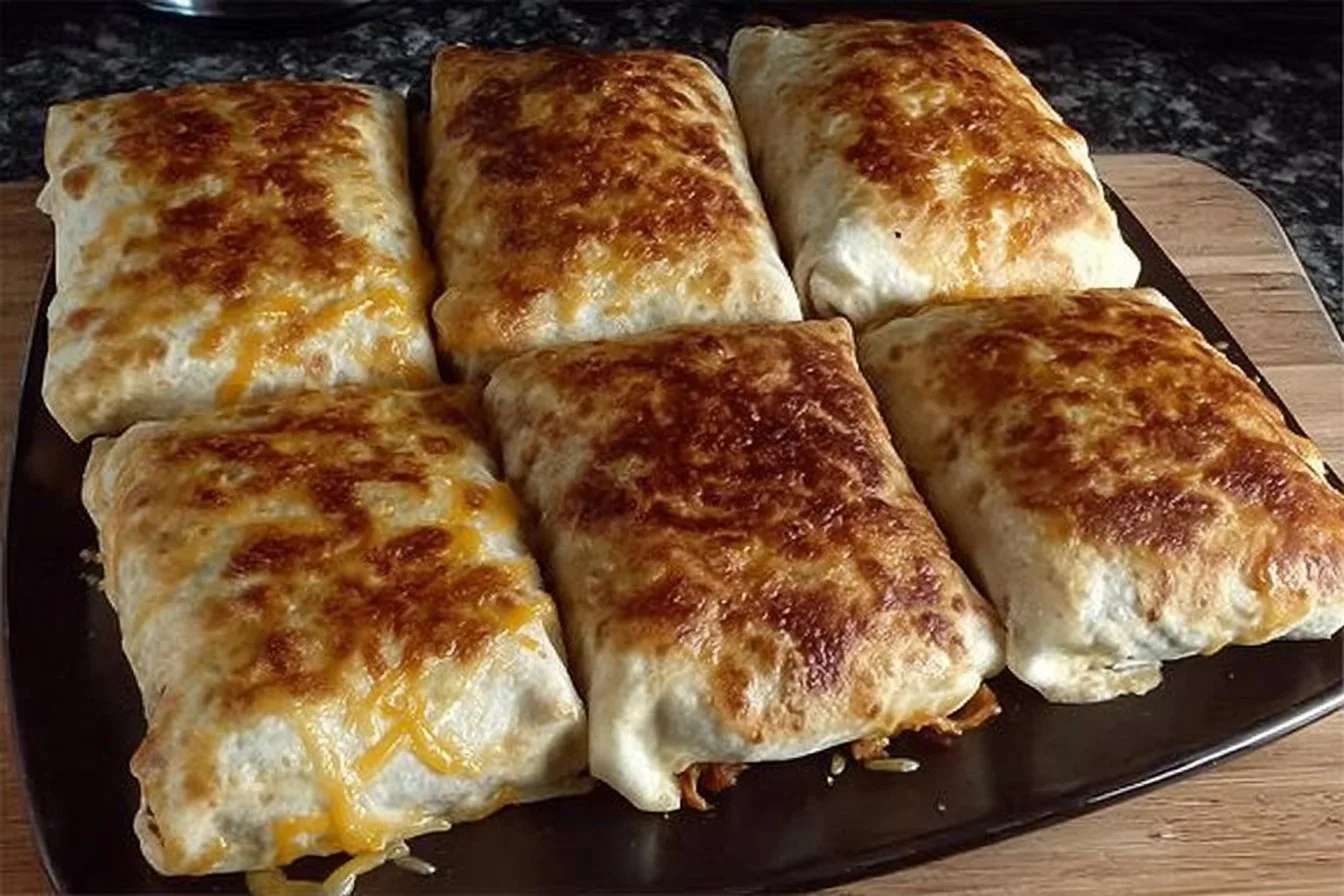
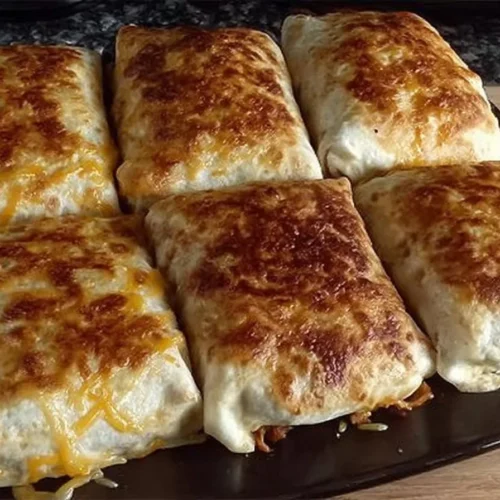
Imagine a dinner that’s irresistibly crispy on the outside, packed with creamy, cheesy goodness on the inside, and ready to win over the entire family in just about 30 minutes. That’s the magic of Baked Chicken Chimichangas—a lighter twist on the classic, deep-fried favorite. For years, this Tex-Mex staple has been a hit in our house, and it never fails to bring everyone to the table with smiling faces and hearty appetites.
Did you know chimichangas are often called the “ultimate comfort food” at potlucks? I remember the first time I made a batch for a weekend movie night; the tray disappeared before the opening credits rolled. What I love most is how this version ditches the fryer and lets your oven do all the work, offering all the flavor minus the mess.
Like my popular Easy Taco Casserole, this recipe is a timesaver, budget-friendly, and loved by both kids and grown-ups. Ready to uncover your new weeknight hero dish? Let’s dive in, because your family is going to ask for Baked Chicken Chimichangas again and again!
What is Baked Chicken Chimichangas?
Let’s tackle the name: “chimichanga” may sound like something a magician would say while pulling a rabbit from a hat, but trust me, there’s real magic in every bite! A chimichanga is basically a burrito that’s gone on an adventure—traditionally deep-fried until golden and crispy, but in this version, it’s happily oven-baked. Why is it called a chimichanga? Some say it comes from a Mexican chef trying to mumble a less-than-polite word when she accidentally dropped a burrito in hot oil—kitchen accidents, am I right? As they say, the way to a man’s heart is through his stomach! Gather your ingredients, and let these baked beauties work their charm in your kitchen tonight.
Why You’ll Love This
First, let’s talk about that rich, melty interior—creamy cheese blended with tender chicken and savory taco spices, all snuggled inside a golden, oven-baked tortilla that offers just enough crunch in every bite. It’s an explosion of bold Tex-Mex flavor that’s as fun to eat as it is to make.
On a budget? Making Baked Chicken Chimichangas at home means you’ll get restaurant-quality taste for a fraction of the price. Plus, you control everything from the cheese blend to the toppings, so you can adjust for even the pickiest eaters.
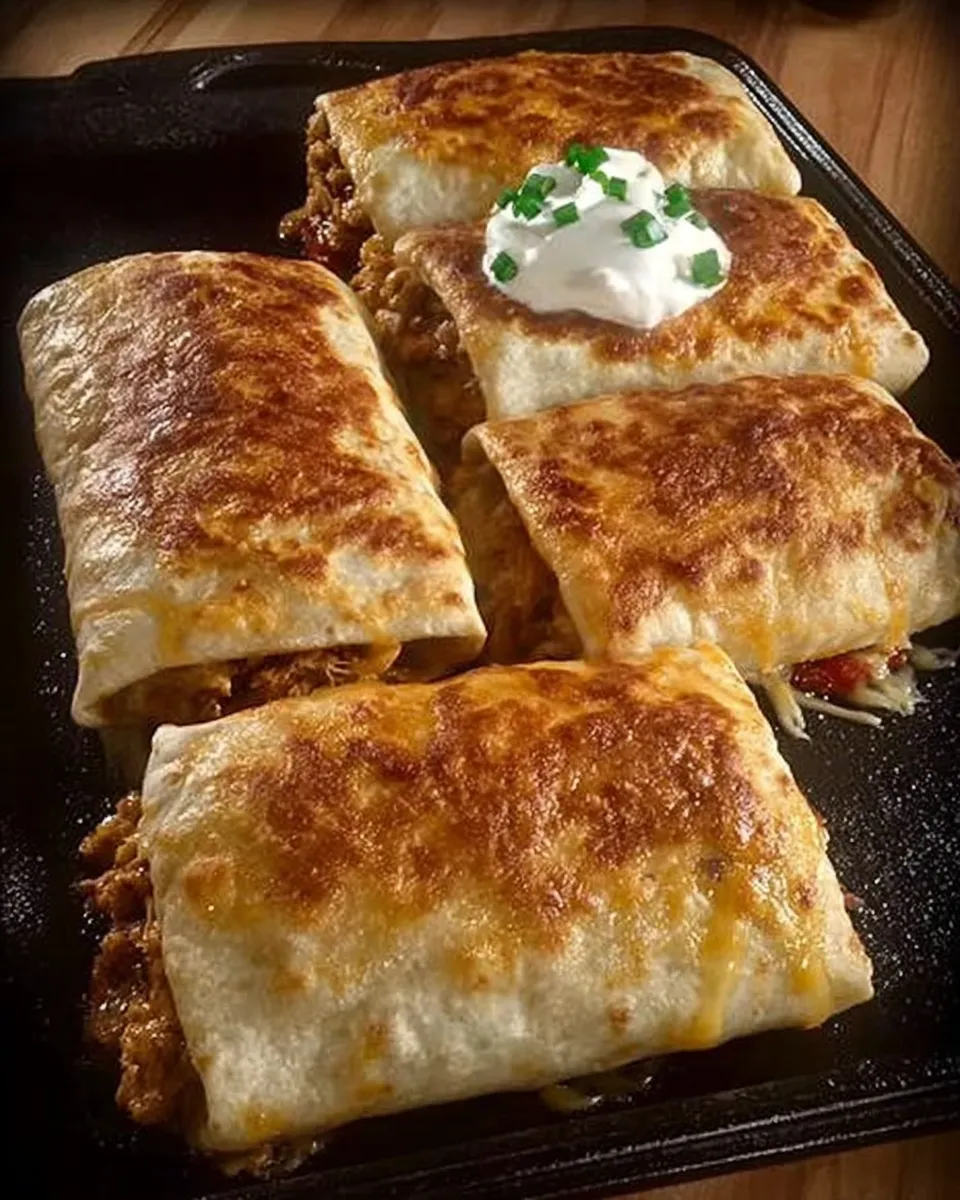
Speaking of toppings, don’t forget the generous handfuls of shredded cheddar, a sprinkle of green onions, and a big dollop of sour cream or salsa to finish your masterpiece. It’s the same customizable flair that made my Enchilada Bake so popular, giving you endless room to add or switch up your favorite flavors. There’s no better time to treat yourself and your crew to a homemade Tex-Mex classic—give this recipe a try and taste the difference!
How to Make
Quick Overview
There’s nothing complicated about Baked Chicken Chimichangas, and that’s the beauty of it! All you need is one bowl, one baking sheet, and about 30 minutes start to finish. The creamy, cheesy filling comes together in minutes, and instead of deep-frying, you’ll get a perfectly crisp finish with a simple spray of cooking oil and a hot oven. Crispy, gooey, and full of flavor—what more could you ask for in a weeknight dinner?
Ingredients
8 oz package cream cheese, softened
8 oz Pepperjack cheese, shredded
1 1/2 tablespoons taco seasoning
1 lb cooked chicken, shredded (rotisserie chicken works great)
8 flour tortillas, large burrito size
Cooking spray
Shredded cheddar cheese, for topping
Green onions, sliced, for garnish
Sour cream, for serving
Salsa, for serving
Step-by-Step
-
Preheat your oven to 400°F (200°C). Line a large baking sheet with parchment paper or lightly grease with cooking spray.
-
In a large mixing bowl, combine the softened cream cheese, shredded Pepperjack cheese, and taco seasoning. Mix until well blended.
-
Add the shredded chicken to the cheese mixture. Stir until the chicken is completely coated and everything is evenly distributed.
-
Lay out your flour tortillas on a clean surface. Spoon a generous portion of the chicken and cheese filling onto the center of each tortilla.
-
Fold in the sides, then roll up the tortilla tightly like a burrito, tucking in the ends as you go to keep the filling secure.
-
Place each filled tortilla seam-side down on the prepared baking sheet. Lightly spray the tops with cooking spray for extra crispness.
-
Bake in the preheated oven for 20-25 minutes, or until the tortillas are golden and crunchy.
-
Remove from the oven and immediately sprinkle shredded cheddar cheese on top. Let the cheese melt slightly with the residual heat.
-
Garnish with sliced green onions and serve hot with dollops of sour cream and spoonfuls of salsa.
What to Serve Baked Chicken Chimichangas With
Baked Chicken Chimichangas shine as the star of the meal, but a few tasty sides and drinks can take your dinner to the next level. Try serving them with classic Mexican rice, cilantro-lime black beans, or a fresh corn salad for a burst of color and texture. Add a side of guacamole and tortilla chips if you’re feeling festive, or whip up a quick cabbage slaw for a cool, crisp bite. Want to keep things refreshing? Pair with iced agua fresca, sparkling lime water, or even a quick margarita for the grown-ups. Every element builds a complete Tex-Mex feast.
Top Tips for Perfecting
Want that ultra-crispy finish? Don’t skip the cooking spray—it helps the tortillas brown and crackle up like they just left the fryer. Rotisserie chicken is your best friend for saving time, but any leftover cooked chicken can fit right in.
If you don’t have Pepperjack, swap for Monterey Jack or cheddar for a milder version. Feeling adventurous? Toss in some chopped jalapeños or black beans for extra flavor and texture.
Be careful not to overfill your tortillas. Too much filling makes them hard to roll and can cause them to split in the oven. Roll tightly and tuck ends for the neatest finish. For extra crunch, give them a few minutes under the broiler—just watch closely to prevent burning!
Storing and Reheating Tips
Leftover chimichangas can be stored in an airtight container in the refrigerator for up to three days. To reheat, place them on a baking sheet and warm in a 350°F oven for about 10-12 minutes to keep them crisp. Avoid microwaving unless you don’t mind a softer tortilla.
Want to freeze for later? Let chimichangas cool completely, then wrap each one tightly in plastic wrap and foil. Freeze for up to two months. To reheat from frozen, bake at 375°F for about 20-25 minutes or until heated through and crispy on the outside.
FAQs
How spicy are Baked Chicken Chimichangas?
The heat level depends on your cheese and taco seasoning. Pepperjack adds a mild kick, but you can use a milder cheese and mild taco seasoning if you prefer less spice.
Can I use corn tortillas instead of flour?
Flour tortillas are best for chimichangas due to their flexibility and size, but you can use corn if you prefer—just warm them first so they don’t crack.
Can these be made gluten-free?
Absolutely! Just swap in your favorite gluten-free flour tortillas and check that your taco seasoning is gluten-free too.
Is it possible to make these vegetarian?
Definitely—try black beans, sautéed bell peppers, or crumbled tofu in place of chicken for a meatless version.
Can I assemble these ahead of time?
Yes! You can fill and roll the chimichangas a day ahead. Keep them covered in the fridge until you’re ready to bake, or freeze for longer storage.
Conclusion
There’s nothing better than gathering around the dinner table for a meal that’s warm, satisfying, and made with love—especially when it’s as easy and delicious as these Baked Chicken Chimichangas. With just a little prep, a handful of simple ingredients, and less cleanup than the deep-fried version, this recipe is bound to become a new favorite in your home. Don’t forget to load up on the toppings and make it your own!
Give these hearty, flavorful chimichangas a try this week—you might just find yourself reaching for them as your go-to family dinner. And if you loved this recipe, be sure to check out other Tex-Mex favorites from the blog for even more tasty ideas!
Baked Chicken Chimichangas
Equipment
- Mixing Bowl
- Baking Sheet
- Parchment Paper
Ingredients
Ingredients
- 8 oz Cream Cheese softened
- 8 oz Pepperjack Cheese shredded
- 1.5 tablespoons Taco Seasoning
- 1 lb Cooked Chicken shredded (rotisserie chicken works great)
- 8 large Flour Tortillas burrito size
- as needed Cooking Spray
- as needed Shredded Cheddar Cheese for topping
- as needed Green Onions sliced, for garnish
- as needed Sour Cream for serving
- as needed Salsa for serving
Instructions
- Preheat your oven to 400°F (200°C). Line a large baking sheet with parchment paper or lightly grease with cooking spray.
- In a large mixing bowl, combine the softened cream cheese, shredded Pepperjack cheese, and taco seasoning. Mix until well blended.
- Add the shredded chicken to the cheese mixture. Stir until the chicken is completely coated and everything is evenly distributed.
- Lay out your flour tortillas on a clean surface. Spoon a generous portion of the chicken and cheese filling onto the center of each tortilla.
- Fold in the sides, then roll up the tortilla tightly like a burrito, tucking in the ends as you go to keep the filling secure.
- Place each filled tortilla seam-side down on the prepared baking sheet. Lightly spray the tops with cooking spray for extra crispness.
- Bake in the preheated oven for 20-25 minutes, or until the tortillas are golden and crunchy.
- Remove from the oven and immediately sprinkle shredded cheddar cheese on top. Let the cheese melt slightly with the residual heat.
- Garnish with sliced green onions and serve hot with dollops of sour cream and spoonfuls of salsa.
2 comments
Surprisingly good! Pan-fried then shredded 2 good-sized chicken breasts, warmed the cream cheese for 30 seconds in the microwave, used 1 packet of low-sodium taco seasoning, and broiled for 2 minutes to melt the cheddar on top. Some tortillas tore when rolling but still baked nicely and were very tasty!
👍🏾👍🏾