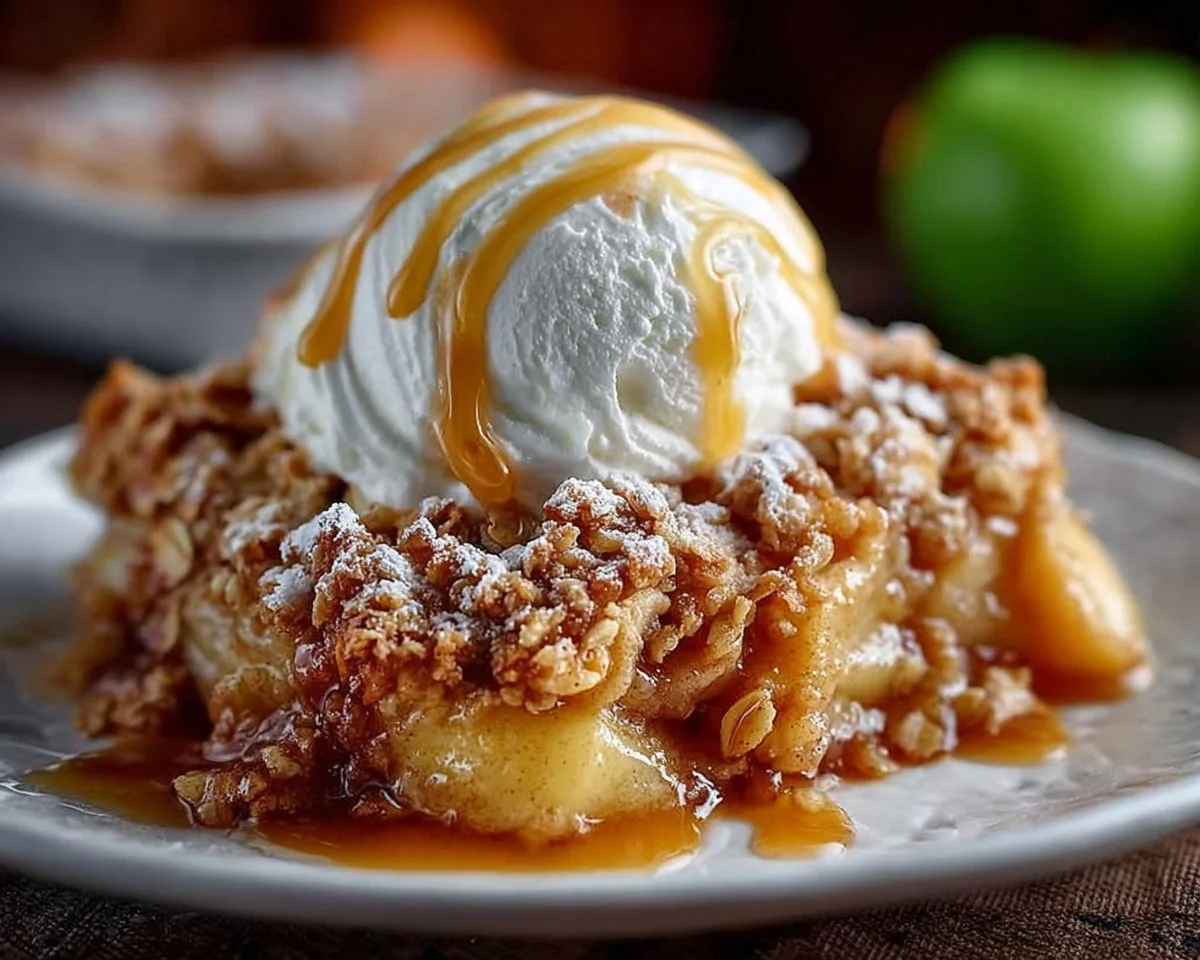
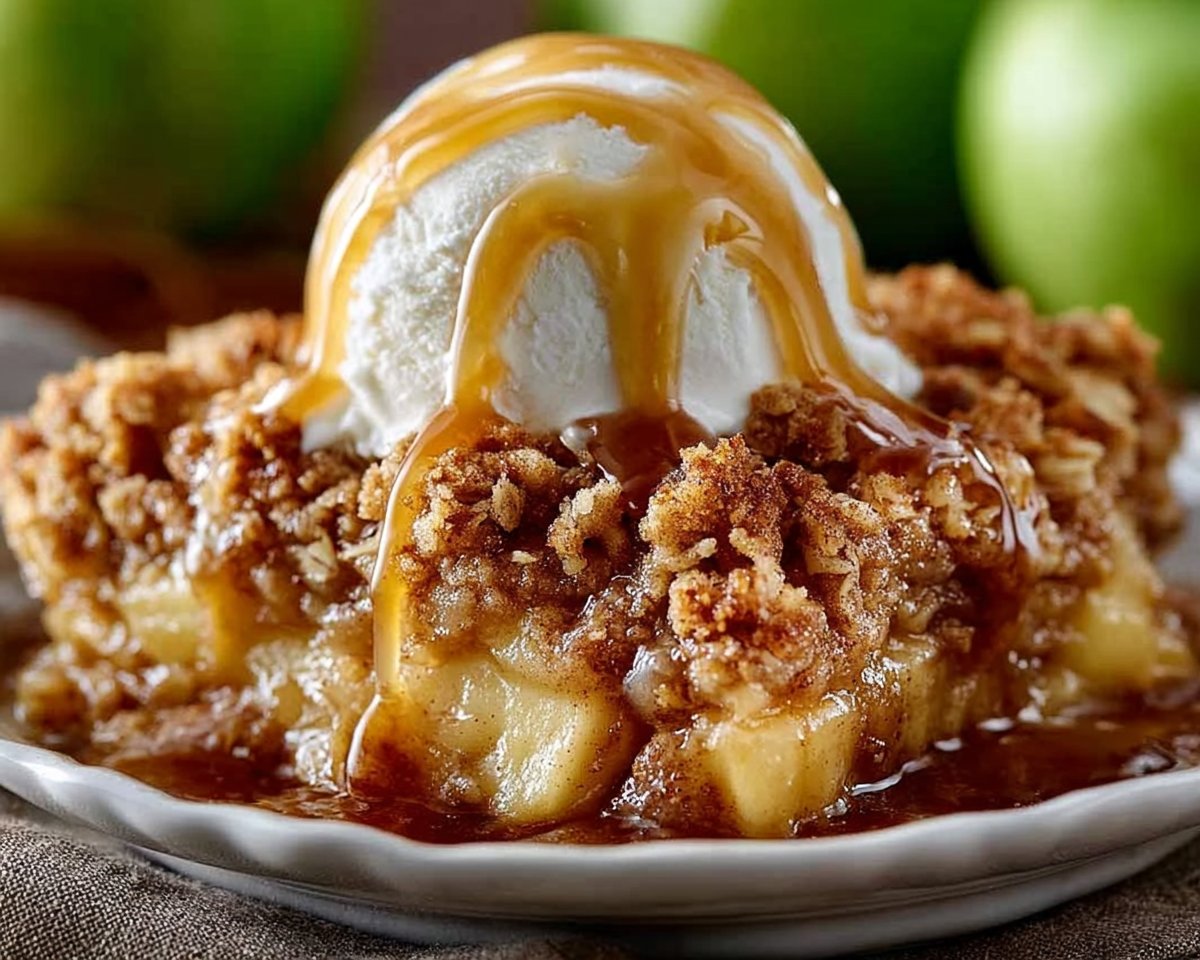
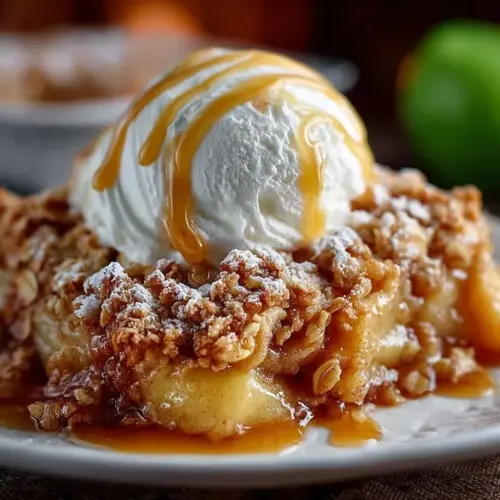
Creamy, juicy, and wonderfully comforting, this Apple Crisp is the kind of dessert that fills the kitchen with warm spice and invites everyone to gather around the table. A crunchy oat and brown sugar topping meets tender, cinnamon-scented apples—simple, satisfying, and perfect any night of the week. Fun fact: apple crisps became wildly popular during the Great Depression because they’re an economical way to turn a few apples into something extraordinary.
This recipe is special because it’s quick to prepare, family-friendly, and forgiving for kitchen beginners. If you love easy fruit desserts, you’ll also enjoy our classic apple crisp guide that explores a few tasty variations. Read on and get excited—this apple crisp is straightforward to make and impossible not to love.
What is Apple Crisp?
Ever wonder why it’s called an apple crisp? Is it the apples, the topping, or the sound your fork makes as it breaks through that golden crust? The name likely comes from the crisp texture of the oat-and-butter topping that contrasts with soft baked apples. Maybe it’s named after the satisfying crunch—call it culinary onomatopoeia.
There’s a playful story that a baker once called it “crisp” just to get folks to taste it. After all, “the way to a man’s heart is through his stomach.” So why not let everyone test that theory? Give this recipe a try and see who it wins over first.
Why You’ll Love This:
- Comforting contrast: Warm, tender apples and a crunchy, buttery oat topping create a perfect texture contrast that feels like a hug in dessert form.
- Wallet-friendly: Making apple crisp at home is cheaper than ordering dessert or buying specialty pastries—apples and pantry staples go a long way.
- Flavor boosters: Brown sugar, vanilla, and cinnamon add depth; the oats and butter crisp up to make every spoonful memorable.
If you enjoyed the flavors here, check out a similar spin in our old-fashioned apple crisp for a nostalgic variation. Now roll up your sleeves and let’s bake something delicious.
How to Make:
Quick Overview
This recipe is easy, fast, and satisfying. Preparation is straightforward—toss the apples, mix the topping, layer, and bake. Expect a delightful mix of tender fruit and a crispy, golden finish. Prep time is about 15 minutes, and baking time is 35 to 40 minutes, for a total of roughly 50–55 minutes.
Ingredients
- 6 cups apples, peeled, cored, and thinly sliced (about 4 medium apples)
- 1/2 cup all-purpose flour, measured and leveled
- 1/2 cup old-fashioned oats (not instant)
- 1/2 cup light-brown sugar, packed
- 1/3 cup unsalted butter, cold and diced into small pieces
- 1/2 tsp ground cinnamon
- 1 tsp vanilla extract
Directions
- Preheat oven to 375 degrees F (190 degrees C). Grease a 9×9-inch baking dish or similar size with a little butter or nonstick spray.
- In a large mixing bowl, combine the peeled and sliced apples with 1/2 teaspoon ground cinnamon and 1 teaspoon vanilla extract. Toss until the apple slices are evenly coated. Make sure slices are about 1/4 inch thick for even baking.
- In another bowl, stir together 1/2 cup all-purpose flour, 1/2 cup old-fashioned oats, and 1/2 cup light-brown sugar until well mixed.
- Add the 1/3 cup diced, cold unsalted butter to the dry mixture. Use a pastry cutter, two forks, or your fingertips to cut the butter into the flour mixture until it looks crumbly and the largest butter pieces are about pea-sized.
- Layer the apple mixture evenly in the prepared baking dish. Sprinkle the crumb topping evenly over the apples, covering them in one even layer.
- Place the dish on the middle rack of your preheated oven. Bake for 35 to 40 minutes, or until the topping is golden brown and the apples are tender when pierced with a fork.
- Remove from the oven and let cool on a wire rack for 10 minutes before serving. This short rest helps the juices settle so slices hold together.
What to Serve With:
- Vanilla ice cream or whipped cream for a classic warm-and-cold contrast
- A drizzle of caramel sauce for extra indulgence
- Freshly brewed coffee or a cinnamon-spiced latte to complement the spices
- A sharp cheddar slice on the side for a surprising sweet-and-salty pairing
- Light salads or roasted pork for a full meal where the crisp serves as dessert
Top Tips for Perfecting:
- Apple choice matters: Use a mix of tart (Granny Smith) and sweet (Honeycrisp) apples for balanced flavor and texture.
- Keep the butter cold: Cold butter in the topping produces a flakier, crisper texture. Don’t melt it.
- Don’t over-slice apples: Too-thin slices become mushy; about 1/4 inch is ideal.
- Add texture: Stir in 1/4 cup chopped nuts (pecans or walnuts) to the topping for extra crunch.
- Prevent sogginess: Toss apples with a teaspoon of cornstarch if your apples are especially juicy—this helps thicken the filling.
- Watch the edges: If the topping browns too quickly, tent the dish loosely with foil for the last 10 minutes of baking.
Storing and Reheating Tips:
- Refrigeration: Store leftover apple crisp in an airtight container in the refrigerator for up to 4 days.
- Freezing: Cool completely, then freeze in a freezer-safe container for up to 3 months. Thaw overnight in the refrigerator before reheating.
- Reheating: Warm individual portions in the microwave for 30–60 seconds, or reheat a larger portion in a 350°F (175°C) oven for 10–15 minutes until warmed through and crisp on top.
- To revive crispiness: Sprinkle a few oats on top and heat briefly in a hot oven to refresh the crunch.
FAQs
What apples work best for apple crisp?
A mix of tart and sweet apples like Granny Smith and Honeycrisp or Fuji gives the best balance of flavor and texture.
Can I make this ahead of time?
Yes. Assemble the crisp, cover, and refrigerate for up to 24 hours before baking. Add a few extra minutes to the baking time if starting from chilled.
Can I use frozen apples?
You can, but thaw and drain excess liquid first. You may also want to add 1–2 teaspoons of cornstarch to thicken the filling.
Is there a gluten-free option?
Replace the all-purpose flour with a gluten-free 1:1 baking blend and use certified gluten-free oats for a safe alternative.
How do I keep the topping from getting soggy?
Use cold butter, don’t overload the filling with juice, and bake until topping is golden. Tent with foil only if the top is browning too quickly.
Conclusion
This apple crisp is a delightful, easy dessert that tastes like home—crispy topping, warm spiced apples, and minimal fuss. It’s perfect for weeknights, family gatherings, or whenever you need a simple, satisfying sweet. For another tried-and-true version with a nostalgic twist, check out this Old Fashioned Easy Apple Crisp. Give this recipe a try, share it with loved ones, and enjoy every golden bite.
Apple Crisp
Equipment
- Mixing Bowl
- Baking Dish
Ingredients
Fruits
- 6 cups apples, peeled, cored, and thinly sliced (about 4 medium apples)
Topping
- 1/2 cup all-purpose flour measured and leveled
- 1/2 cup old-fashioned oats (not instant)
- 1/2 cup light-brown sugar packed
- 1/3 cup unsalted butter cold and diced into small pieces
- 1/2 tsp ground cinnamon
- 1 tsp vanilla extract
Instructions
- Preheat oven to 375 degrees F (190 degrees C). Grease a 9×9-inch baking dish or similar size with a little butter or nonstick spray.
- In a large mixing bowl, combine the peeled and sliced apples with 1/2 teaspoon ground cinnamon and 1 teaspoon vanilla extract. Toss until the apple slices are evenly coated. Make sure slices are about 1/4 inch thick for even baking.
- In another bowl, stir together 1/2 cup all-purpose flour, 1/2 cup old-fashioned oats, and 1/2 cup light-brown sugar until well mixed.
- Add the 1/3 cup diced, cold unsalted butter to the dry mixture. Use a pastry cutter, two forks, or your fingertips to cut the butter into the flour mixture until it looks crumbly and the largest butter pieces are about pea-sized.
- Layer the apple mixture evenly in the prepared baking dish. Sprinkle the crumb topping evenly over the apples, covering them in one even layer.
- Place the dish on the middle rack of your preheated oven. Bake for 35 to 40 minutes, or until the topping is golden brown and the apples are tender when pierced with a fork.
- Remove from the oven and let cool on a wire rack for 10 minutes before serving. This short rest helps the juices settle so slices hold together.