Creamy, crunchy, and utterly irresistible — this Rice Krispie Treat Cheesecake combines the nostalgic chew of Rice Krispies with a silky cheesecake center for a dessert that truly has it all. Perfect for potlucks, family nights, or anytime you want something both playful and elegant, this recipe is a crowd-pleaser that comes together quickly with pantry-friendly ingredients. Fun fact: marshmallows and crisped rice have been teaming up since the 1930s — who knew they’d end up partnering with cream cheese to make dessert history?
This recipe is special because it’s simple, fast to prepare, and family-friendly, making it a great pick if you want an impressive dessert without fuss. If you enjoy playful hybrids, you might also like our creative takes on Rice Krispie desserts like the classic Rice Krispie Treat Cheesecake recipe on the blog. Read on — you’ll be excited to make this.
What is Rice Krispie Treat Cheesecake?
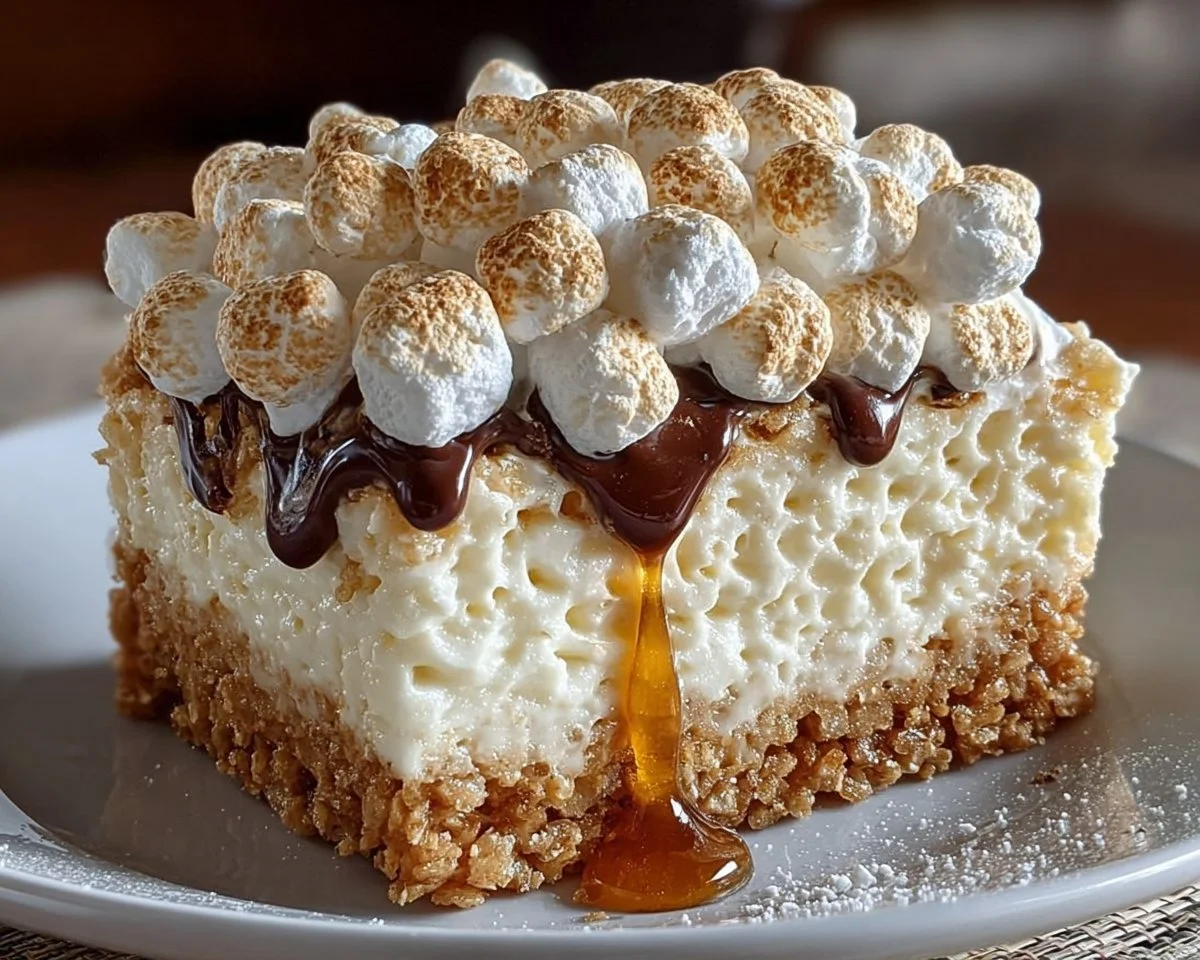
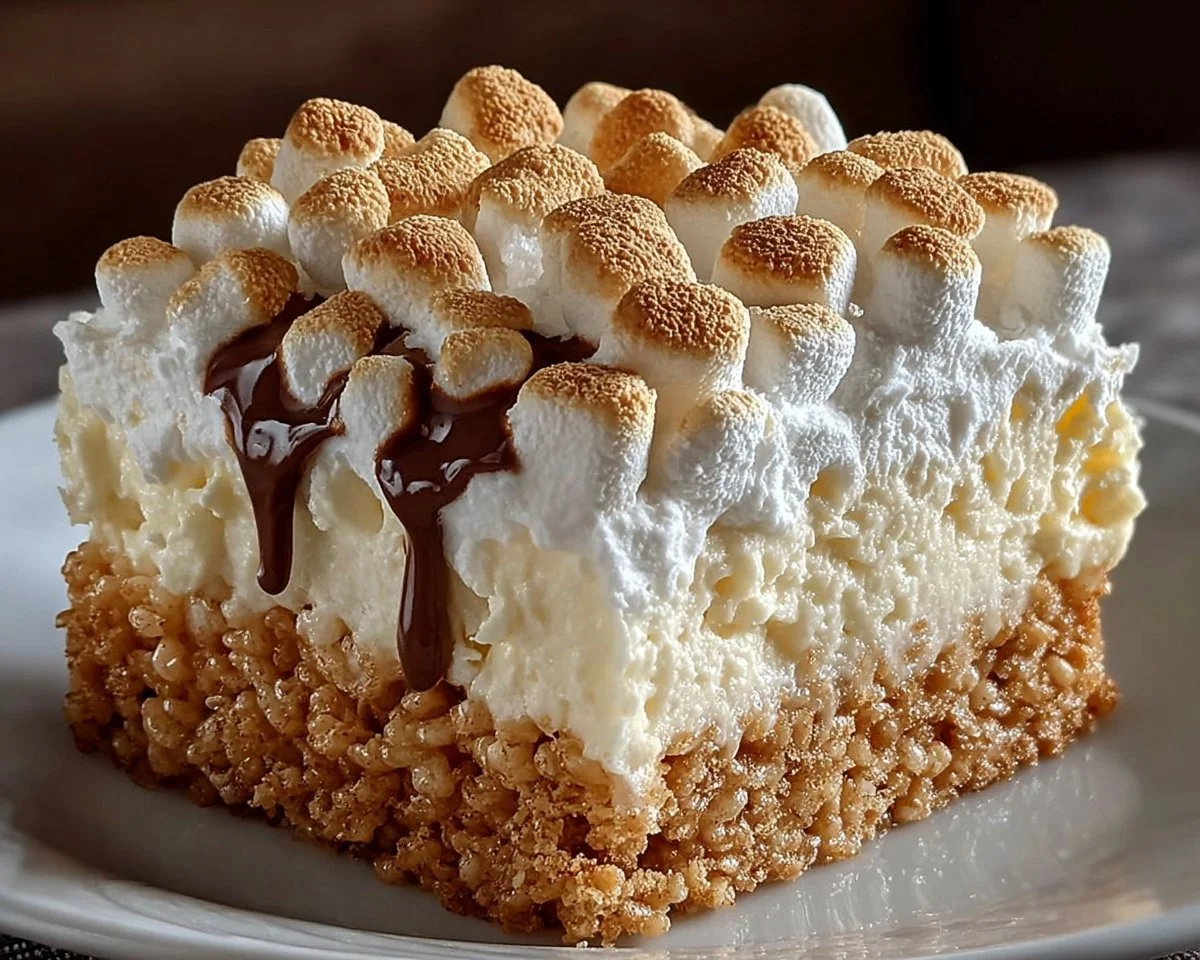
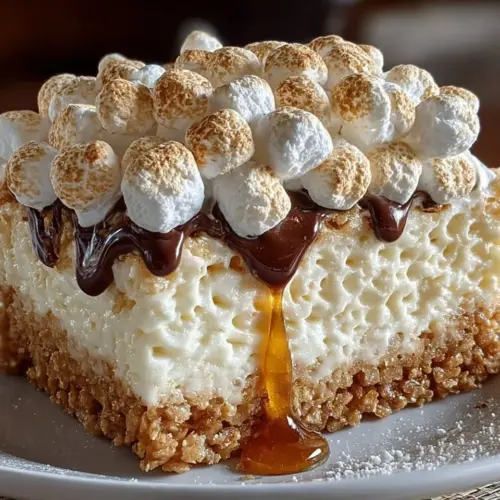
What’s in a name? Rice Krispie Treat Cheesecake is exactly what it sounds like: a cheesecake built on a crunchy Rice Krispies crust and finished with marshmallows and chocolate. Curious where the name came from — who decided to marry a childhood snack with a formal dessert? Maybe someone thought, “Why not?” and the rest is delicious history. After one bite you’ll probably agree with the old adage that “the way to a man’s heart is through his stomach.” Tempted to try it? Go on — your tastebuds will thank you.
Why You’ll Love This
- Creamy meets crunchy: A smooth, rich cheesecake filling contrasts with a crispy, marshmallow-y Rice Krispies crust for texture joy in every bite.
- Cost-effective and simple: Uses pantry staples like cereal, marshmallow fluff, cream cheese, and a few extras — cheaper than a bakery version and simple to make at home.
- Flavorful finishing touches: Mini marshmallows and a chocolate drizzle add sweet, nostalgic flair and visual appeal that kids and adults love.
If you’re a fan of crunchy-chewy combos, this dessert gives you the same comfort as our salted caramel Rice Krispie treats but in cheesecake form — a fun twist that elevates the everyday into something special. I dare you to try it and not smile.
Make it at home — you’ll be surprised how impressive yet effortless it is.
How to Make
Quick Overview
This recipe is delightfully straightforward: a buttery marshmallow-and-cereal crust, a classic cream cheese filling, and a playful topping. Preparation is minimal and the textures are the standout — creamy filling, crispy crust, and gooey marshmallow notes. Expect about 20 minutes active prep and 45–50 minutes baking time, plus several hours chilling.
Ingredients
- 3 cups Rice Krispies cereal, measured and ready
- 1/4 cup unsalted butter, cut into pieces
- 1/3 cup marshmallow fluff, room temperature
- 16 oz cream cheese, softened to room temperature
- 1/2 cup granulated sugar, measured
- 1 teaspoon vanilla extract
- 2 large eggs, room temperature
- 1/2 cup sour cream, at room temperature
- 1 cup mini marshmallows, for topping
- 1/2 cup Rice Krispies cereal, reserved for topping
- 1/4 cup melted chocolate, for drizzling (melted until smooth)
Directions
- Prep the crust: Grease a 9-inch springform pan. In a medium saucepan over low heat, add the unsalted butter and allow it to melt slowly. Stir frequently so it doesn’t brown.
- Add marshmallow fluff to the melted butter and stir continuously until the mixture is smooth and evenly combined. Remove the pan from heat as soon as it’s smooth.
- Mix in the Rice Krispies cereal, folding gently until every piece is well-coated in the marshmallow-butter mixture.
- Firmly press the coated Rice Krispies into the bottom of the prepared 9-inch springform pan to form an even crust layer. Use the back of a measuring cup for a compact finish. Set aside to cool slightly.
- Make the cheesecake filling: In a large bowl, beat the softened cream cheese until creamy and free of lumps. Add the granulated sugar and vanilla extract and continue to beat until smooth.
- Add the eggs one at a time, beating on low speed and ensuring each is incorporated before adding the next. Do not overmix — stop when the filling is smooth.
- Gently fold in the sour cream with a spatula until just combined. This keeps the filling silky and prevents overbeating.
- Pour the cheesecake filling over the prepared Rice Krispies crust, smoothing the top with an offset spatula to create an even layer.
- Bake: Preheat your oven to 325°F (165°C). Place the springform pan on a middle rack and bake for 45–50 minutes, or until the edges are set and the center is slightly jiggly but not liquid.
- Turn off the oven and crack the oven door open. Let the cheesecake cool in the oven for about one hour to minimize cracking.
- Add toppings: Once cooled to room temperature, sprinkle mini marshmallows and the extra 1/2 cup Rice Krispies over the top. Drizzle with the 1/4 cup melted chocolate in a decorative pattern.
- Chill: Refrigerate the cheesecake for at least 4 hours or ideally overnight to allow it to set fully before serving.
What to Serve With
- Fresh berries or a simple berry compote to cut through the sweetness
- A dollop of lightly whipped cream for extra creaminess
- Coffee or a latte — the bitterness pairs well with the sweet, marshmallow flavor
- Vanilla ice cream for a decadent, chilled contrast
- A light green salad with citrus vinaigrette if you’re serving this as part of a larger meal
Top Tips for Perfecting
- Soften your cream cheese: Room-temperature cream cheese mixes more smoothly and reduces lumps in the filling.
- Avoid overmixing: Once eggs are added, mix just until combined to prevent a dense or cracked cheesecake.
- Press crust firmly: A tightly packed crust helps support the cheesecake filling and keeps slices neat.
- Toast mini marshmallows lightly under a broiler for a minute if you want a golden top — watch carefully so they don’t burn.
- Substitute ideas: Use marshmallow creme if you don’t have marshmallow fluff; swap melted dark chocolate for milk chocolate for a richer drizzle.
Storing and Reheating Tips
- Refrigeration: Store the cheesecake covered in the refrigerator for up to 4 days. Tightly wrap the springform pan with plastic wrap or place slices in an airtight container.
- Freezing: You can freeze the cheesecake (without the crispy topping) for up to 1 month. Wrap tightly in plastic wrap and foil. Thaw in the refrigerator overnight before serving and add fresh toppings after thawing.
- Reheating: Serve chilled. If you prefer slightly softer slices, let them sit at room temperature for 15–20 minutes before serving; avoid microwaving to preserve texture.
FAQs
Can I use regular marshmallows instead of marshmallow fluff?
Yes. Melt regular marshmallows with the butter over low heat until smooth to substitute for marshmallow fluff.
Will the Rice Krispies crust stay crunchy?
The crust will be slightly soft next to the filling but should retain some crunch on top if added after baking. Adding reserved Rice Krispies and marshmallows just before chilling keeps extra crunch.
Can I make this as a no-bake cheesecake?
This particular version is baked for stability, but you can look into a no-bake adaptation that uses gelatin or extra sour cream and chilling for several hours instead.
How do I prevent the cheesecake from cracking?
Avoid overbeating the batter and cool it slowly in the oven with the door ajar for about an hour. This reduces temperature shock and cracking.
Can I use low-fat cream cheese or sour cream?
Low-fat options can be used, but they may alter texture and richness. Full-fat ingredients give the creamiest results.
Conclusion
This Rice Krispie Treat Cheesecake is a playful, comforting dessert that marries childhood nostalgia with classic cheesecake elegance — simple to prepare, wallet-friendly, and sure to earn compliments. Give it a try for your next gathering and watch it disappear fast. For another fun no-bake twist on a similar idea, check out this inspiration from Rice Krispy Treat No Bake Cheesecake | The Domestic Rebel.
Rice Krispie Treat Cheesecake
Equipment
- 9-inch springform pan
- Medium Saucepan
- Mixing Bowl
- Spatula
- Offset Spatula
Ingredients
Crust Ingredients
- 3 cups Rice Krispies cereal Measured and ready
- 1/4 cup Unsalted butter Cut into pieces
Filling Ingredients
- 1/3 cup Marshmallow fluff Room temperature
- 16 oz Cream cheese Softened to room temperature
- 1/2 cup Granulated sugar Measured
- 1 teaspoon Vanilla extract
- 2 large Eggs Room temperature
- 1/2 cup Sour cream At room temperature
Topping Ingredients
- 1 cup Mini marshmallows For topping
- 1/2 cup Rice Krispies cereal Reserved for topping
- 1/4 cup Melted chocolate For drizzling (melted until smooth)
Instructions
- Prep the crust: Grease a 9-inch springform pan. In a medium saucepan over low heat, add the unsalted butter and allow it to melt slowly. Stir frequently so it doesn’t brown.
- Add marshmallow fluff to the melted butter and stir continuously until the mixture is smooth and evenly combined. Remove the pan from heat as soon as it’s smooth.
- Mix in the Rice Krispies cereal, folding gently until every piece is well-coated in the marshmallow-butter mixture.
- Firmly press the coated Rice Krispies into the bottom of the prepared 9-inch springform pan to form an even crust layer. Use the back of a measuring cup for a compact finish. Set aside to cool slightly.
- Make the cheesecake filling: In a large bowl, beat the softened cream cheese until creamy and free of lumps. Add the granulated sugar and vanilla extract and continue to beat until smooth.
- Add the eggs one at a time, beating on low speed and ensuring each is incorporated before adding the next. Do not overmix — stop when the filling is smooth.
- Gently fold in the sour cream with a spatula until just combined. This keeps the filling silky and prevents overbeating.
- Pour the cheesecake filling over the prepared Rice Krispies crust, smoothing the top with an offset spatula to create an even layer.
- Bake: Preheat your oven to 325°F (165°C). Place the springform pan on a middle rack and bake for 45–50 minutes, or until the edges are set and the center is slightly jiggly but not liquid.
- Turn off the oven and crack the oven door open. Let the cheesecake cool in the oven for about one hour to minimize cracking.
- Add toppings: Once cooled to room temperature, sprinkle mini marshmallows and the extra 1/2 cup Rice Krispies over the top. Drizzle with the 1/4 cup melted chocolate in a decorative pattern.
- Chill: Refrigerate the cheesecake for at least 4 hours or ideally overnight to allow it to set fully before serving.