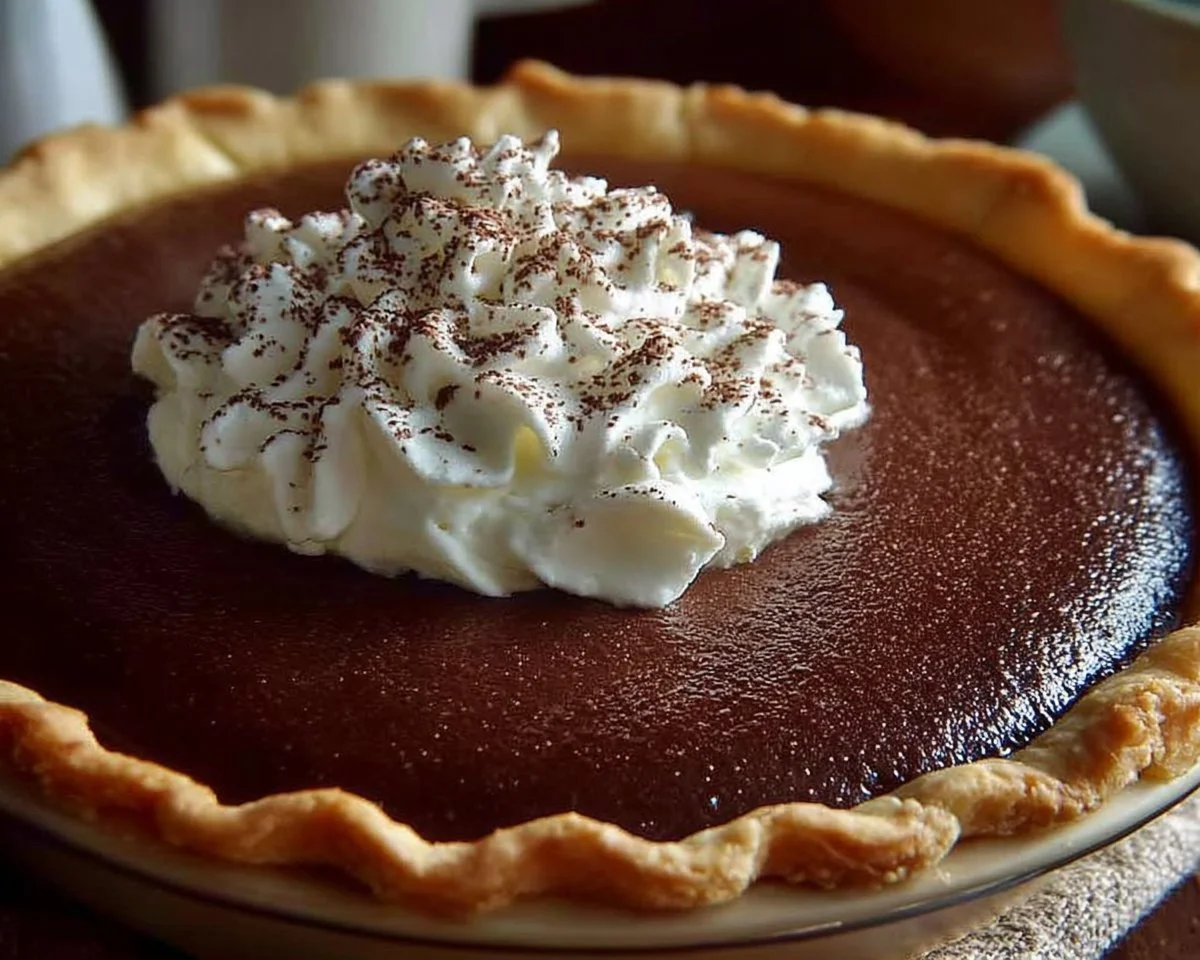
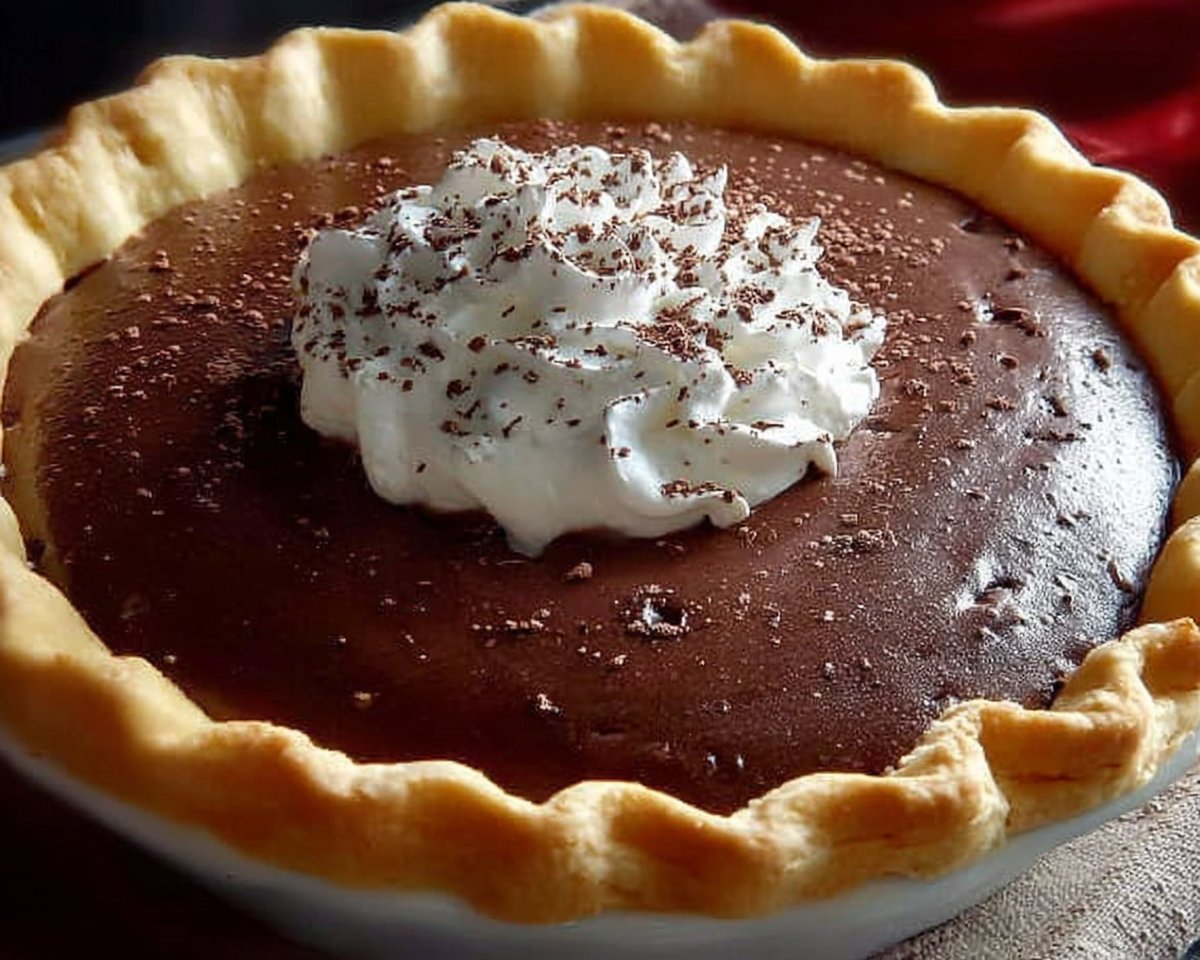
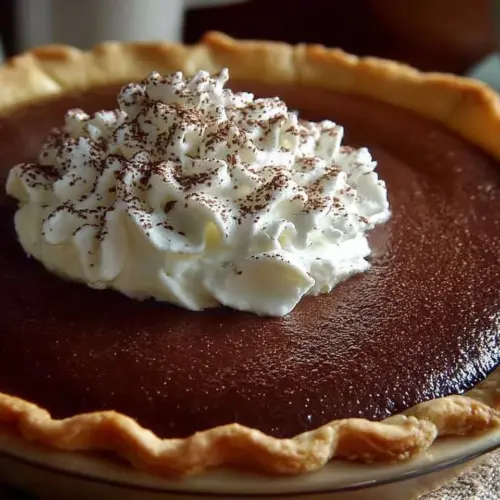
Creamy, comforting, and impossibly easy to love — Granny’s Cocoa Cream Pie is the kind of dessert that hugs you from the inside out. With a silky chocolate custard nestled in a buttery pre-baked pie shell, this pie delivers rich cocoa flavor and a pillow-soft texture that’s perfect for weeknight treats or holiday gatherings. Fun fact: many old-fashioned pies like this one were whipped up with pantry staples and a lot of love, which is why they still taste like nostalgia in every bite. If you enjoy retro desserts with modern convenience, you might also appreciate lighter takes like these Boston cream pie cupcakes that capture similar flavors in single-serving form. Simple to make, family-friendly, and quick to prepare, this pie is ready to become a new classic at your table.
What is Granny’s Cocoa Cream Pie?
Why “Granny’s”? Who doesn’t imagine a warm kitchen, a wooden spoon, and a secret wink from Grandma when a recipe gets that name? Is it because grandmothers are the unofficial dessert scientists of the family, or because they knew early on that “the way to a man’s heart is through his stomach.”? Maybe both. This pie is a playful nod to those beloved, no-nonsense desserts that used common pantry ingredients to create something unforgettable. Try it and you’ll understand why a recipe like this could have been passed down through generations — it’s reliable, comforting, and perfect for sharing with people you love. Go on, give it a try and start your own family tradition.
Why You’ll Love This:
- Silky chocolate custard is the star: The filling is rich and smooth, with deep cocoa notes and a custardy mouthfeel that melts on the tongue. It’s decadent without being heavy.
- Cost-effective comfort: Made from pantry staples like cocoa, eggs, milk, and sugar, this pie is budget-friendly compared with store-bought specialty desserts. You get big flavor for little money.
- Versatile toppings and add-ins: Whether you crown it with billowy whipped cream, a cloud of meringue, or a dusting of grated chocolate, the toppings take this pie to the next level and let you personalize it for any occasion.
For another creamy, no-bake indulgence with a crunchy shell and ricotta-style filling, check out this delightful Granny’s Cocoa Cream Pie inspiration on our favorite collection. Ready to bake? Let’s make a pie that everyone will ask for by name.
How to Make:
Quick Overview
This recipe is straightforward and satisfying: whisk the dry ingredients and egg yolks, temper with milk, cook until pudding-thick, stir in vanilla, and set in a pre-baked pie shell. The technique is simple, the texture is luxuriously creamy, and the countertop aroma will have your household lining up for a slice. Total time: about 15 minutes active cook time plus 3 hours chilling (short hands-on time).
Approximate times:
- Preparation: 10 minutes
- Cooking: 10–15 minutes
- Chilling: at least 3 hours (or overnight)
Ingredients
- 1/2 cup cocoa powder, sifted if lumpy
- 1/4 cup cornstarch or arrowroot powder (or 1/2 cup all-purpose flour), measured and leveled
- 3 large egg yolks, room temperature
- 1 1/2 cups white sugar, measured and leveled
- 1/4 teaspoon salt, rounded
- 2 cups milk, whole milk preferred for creaminess, cold or room temperature
- 1 teaspoon vanilla extract, pure vanilla for best flavor
- 1 pre-baked 9-inch pie shell, cooled completely
Directions
- Gather everything: measure ingredients, separate the egg yolks (save whites for another use), and have your pre-baked 9-inch pie shell ready on a cooling rack.
- In a heavy-bottomed saucepan, whisk together 1/2 cup cocoa powder, 1/4 cup cornstarch (or 1/2 cup flour), 1 1/2 cups sugar, 1/4 teaspoon salt, and the 3 egg yolks until smooth and uniform. Scrape the sides so there are no lumps.
- Gradually add the 2 cups milk to the mixture while whisking constantly. Pour slowly in a thin stream to prevent lumps and to gently temper the yolks.
- Place the saucepan over medium-high heat. Stir constantly with a heatproof spatula or whisk, making sure to scrape the bottom and sides to avoid scorching. The mixture will thin, then begin to thicken — continue stirring for 10–15 minutes until it reaches a thick pudding-like consistency that coats the back of a spoon.
- Once thickened, remove from heat immediately and stir in 1 teaspoon vanilla extract. Taste and adjust sweetness or cocoa if desired (a pinch more salt can brighten flavors).
- Pour the hot custard into the pre-baked 9-inch pie shell and use a spatula to smooth the top. Tap the pie gently on the counter to remove any air bubbles.
- Cover the pie loosely with plastic wrap (press a piece of plastic directly onto the custard surface to prevent a skin from forming, if desired) and refrigerate for several hours or until fully set — at least 3 hours, preferably overnight.
- Before serving, top with whipped cream, Cool Whip, or a toasted meringue for a show-stopping finish. Slice with a hot, clean knife for neat pieces.
What to Serve With
- Fresh berries or a mixed berry compote to cut the richness with bright, tart notes.
- A crisp green salad with citrus vinaigrette for a light contrast.
- Coffee, espresso, or a rich hot chocolate for an indulgent dessert course.
- Serve alongside light cookies or biscotti for extra crunch. For another creamy, Italian-inspired pairing that combines ricotta-like filling with crunchy edges, consider a Cannoli Cream Pie as an alternate dessert option.
Top Tips for Perfecting
- Use whole milk for best texture; for extra richness, substitute half-and-half for part of the milk.
- To prevent lumps, whisk the dry ingredients thoroughly before adding milk and add milk slowly while whisking.
- Cook on medium-high but keep stirring; thickening happens quickly near the end and constant stirring prevents curdling or scorching.
- If you prefer a silkier custard, strain the hot mixture through a fine mesh sieve before pouring into the crust.
- Don’t skip chilling time — the filling needs hours to set firmly and develop flavor.
- Avoid overcooking: once it coats the spoon, remove from heat. Overcooking can yield a grainy texture.
- Want a lighter topping? Fold a bit of whipped cream into the custard once cooled for a mousse-like variation.
Storing and Reheating Tips
- Refrigeration: Store the pie covered in the refrigerator for up to 4 days. Keep the topping fresh by adding whipped cream just before serving.
- Freezing: You can freeze the pie without whipped toppings for up to 2 months. Wrap tightly in plastic and foil. Thaw overnight in the refrigerator before serving. Note that texture can change slightly after freezing.
- Reheating: This pie is best served cold. If you prefer a slightly softer slice, let it sit at room temperature for 15–20 minutes before serving. Do not microwave whole pie; reheat individual slices very briefly (10–15 seconds) if desired, but this may alter texture.
FAQs
Can I use whole eggs instead of just yolks?
Yes, but using whole eggs will lighten the texture and make the custard less rich. For the classic creamy result, stick to yolks.
Can I make this pie without a pre-baked crust?
You can, but a pre-baked shell ensures a crisp base. If you skip prebaking, blind bake the crust for about 12–15 minutes at 375°F until lightly golden.
Is there a dairy-free version?
Use a full-fat plant milk like canned coconut milk or an oat/cashew blend, and choose a vegan pie shell. Flavor will be slightly different but still delicious.
How do I prevent a skin from forming on the custard?
Press a piece of plastic wrap directly on the surface of the hot custard before chilling, or stir occasionally until it cools slightly.
Can I add mix-ins like nuts or chocolate chips?
Yes — fold in toasted chopped nuts or mini chocolate chips once the custard has cooled slightly but before chilling. Keep proportion modest so the texture remains custardy.
Conclusion
Granny’s Cocoa Cream Pie is a timeless, comforting dessert that’s simple to make yet tastes like a special occasion. With pantry-friendly ingredients, straightforward technique, and flexible topping options, it’s a recipe you’ll return to again and again. If you’d like to read a similar family-style version or learn more about the pie’s backstory, check out this lovely write-up from Forgotten Way Farms: My Granny’s Cocoa Cream Pie – Forgotten Way Farms. Give this recipe a try, share it with loved ones, and enjoy a slice of nostalgia any night of the week.
Granny’s Cocoa Cream Pie
Equipment
- Heavy-Bottomed Saucepan
- Whisk
- Spatula
- Cooling Rack
Ingredients
Ingredients
- 1/2 cup Cocoa powder Sifted if lumpy
- 1/4 cup Cornstarch or arrowroot powder Or 1/2 cup all-purpose flour, measured and leveled
- 3 large Egg yolks Room temperature
- 1 1/2 cups White sugar Measured and leveled
- 1/4 teaspoon Salt Rounded
- 2 cups Milk Whole milk preferred for creaminess, cold or room temperature
- 1 teaspoon Vanilla extract Pure vanilla for best flavor
- 1 9-inch Pre-baked pie shell Cooled completely
Instructions
- Gather everything: measure ingredients, separate the egg yolks (save whites for another use), and have your pre-baked 9-inch pie shell ready on a cooling rack.
- In a heavy-bottomed saucepan, whisk together cocoa powder, cornstarch (or flour), sugar, salt, and egg yolks until smooth and uniform. Scrape the sides to remove lumps.
- Gradually add the milk to the mixture while whisking constantly. Pour slowly to prevent lumps and temper the yolks.
- Place the saucepan over medium-high heat. Stir constantly with a spatula or whisk, scraping the bottom and sides to avoid scorching. Cook until thickened, about 10–15 minutes.
- Once thickened, remove from heat and stir in vanilla extract. Adjust sweetness or cocoa if desired.
- Pour the hot custard into the pre-baked pie shell and smooth the top. Tap gently to remove air bubbles.
- Cover loosely with plastic wrap and refrigerate for several hours or until fully set — at least 3 hours, preferably overnight.
- Before serving, top with whipped cream, Cool Whip, or meringue. Slice with a hot, clean knife for neat pieces.