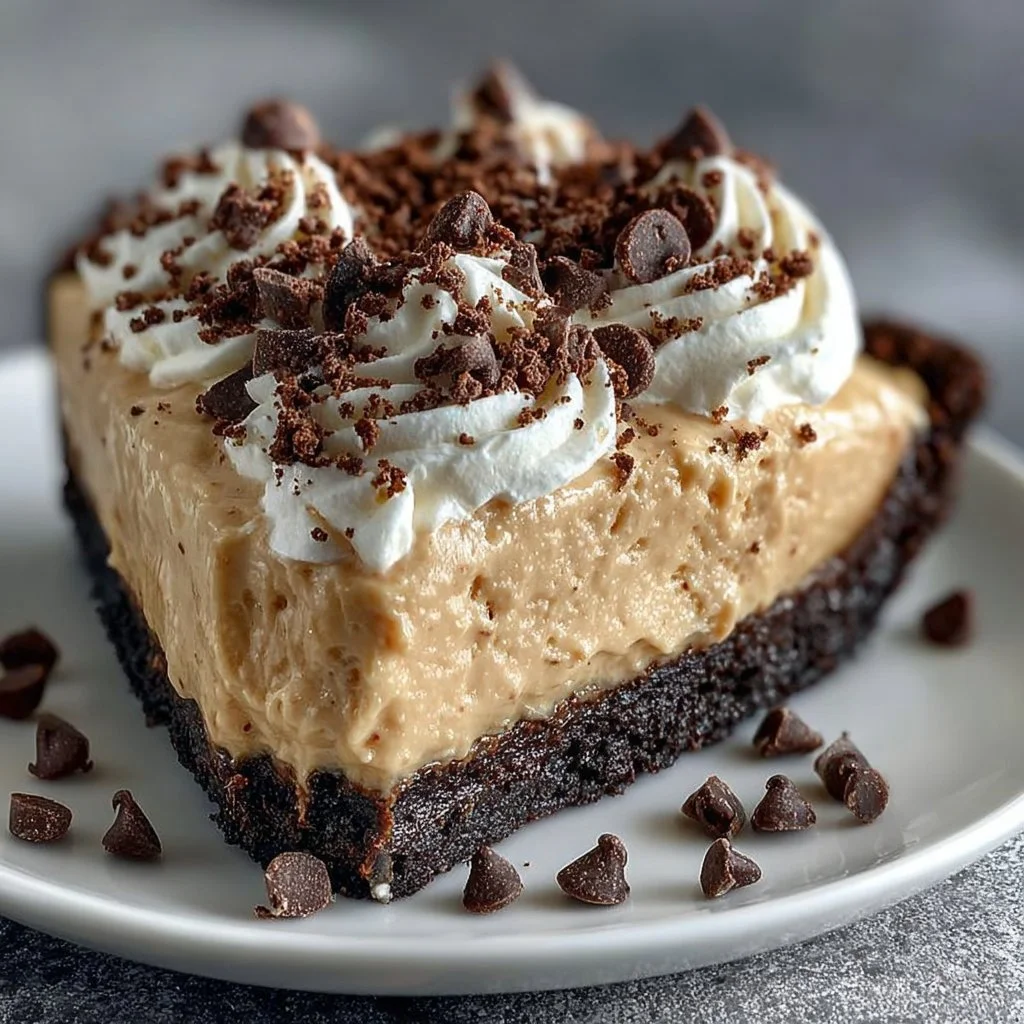
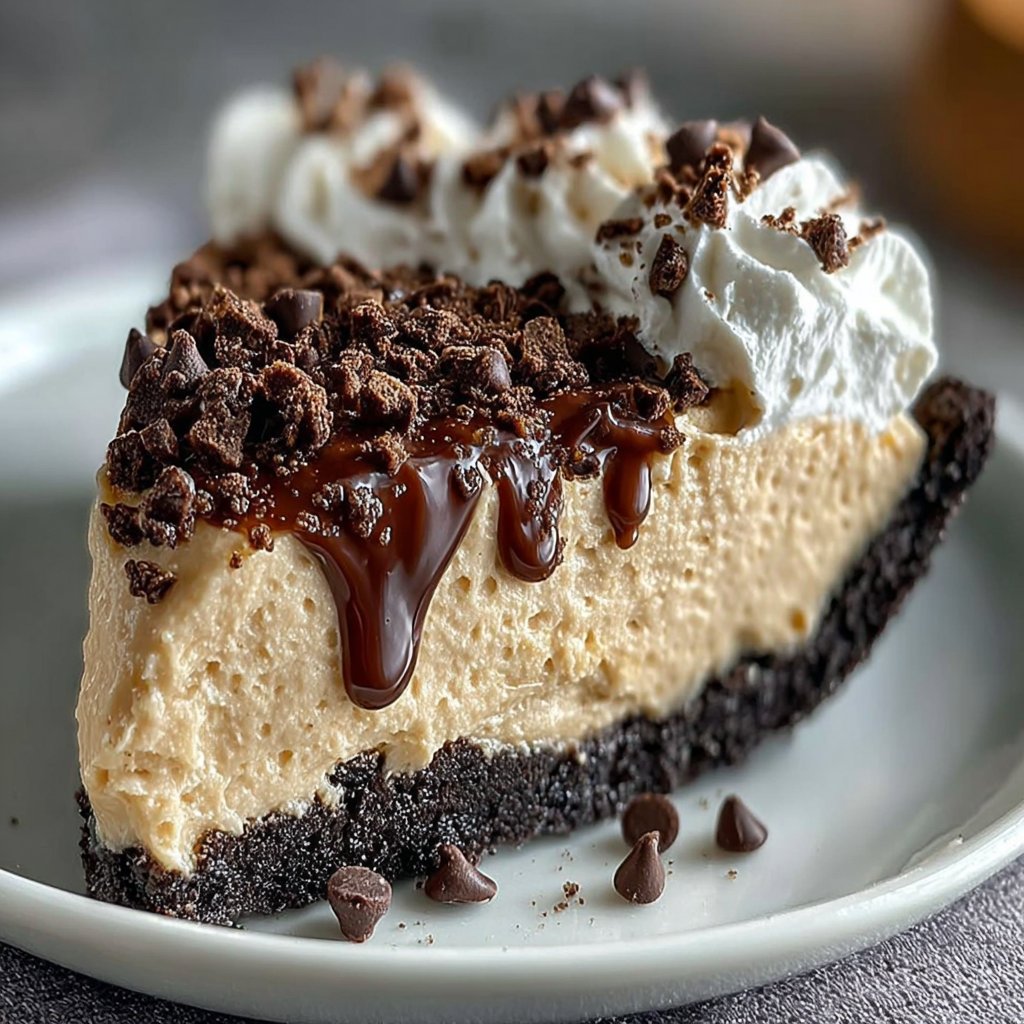
Creamy Peanut Butter Pie with Chocolate Crust is pure comfort in a slice — rich, silky peanut butter filling hugged by a crisp chocolate cookie crust. If you love the sweet-salty combo and an easy dessert that looks impressive with almost no effort, this is your new go-to. Fun fact: peanut butter pie became popular in American home kitchens during the 20th century when refrigeration and whipped cream made no-bake pies simple and reliable. This version keeps things easy and reliable, perfect for weeknight treats or weekend potlucks. If you want more peanut-chocolate ideas, check out Irresistible Chocolate Peanut Butter Rice Krispie Cups for another playful twist. Give this one a try — it’s quick, family-friendly, and hard to resist.
What is Creamy Peanut Butter Pie with Chocolate Crust?
What’s in a name? Creamy Peanut Butter Pie with Chocolate Crust says it all: a luxuriously smooth peanut butter filling set in a crunchy chocolate cookie base. Where did the idea come from — kitchen genius or happy accident? Maybe someone thought, why not put two childhood favorites together and call it a pie? It works because the creamy filling contrasts the slightly bitter chocolate crust so perfectly that you’ll wonder where it’s been all your life. As they say, “the way to a man’s heart is through his stomach.” Ready to find out if that’s true? Make this pie and see for yourself.
Why You’ll Love This
- Decadent creaminess: The filling is velvety and smooth, with a melt-in-your-mouth texture that’s indulgent without being heavy.
- Affordable and simple: Made with pantry staples like peanut butter, powdered sugar, and chocolate cookies, this pie is budget-friendly compared to store-bought specialty desserts. Making it at home saves money and lets you control sweetness and salt.
- Flavor finishing touches: The semisweet chocolate chips on top add texture and a chocolatey pop that balances the richness of the peanut butter. Add a sprinkle of flaky sea salt or a drizzle of melted chocolate for an elevated finish.
If you like other peanut butter desserts, you might enjoy the bite-sized charm of Mini Chocolate Peanut Butter Pies, which share the same great flavors in a smaller form. Now grab your mixing bowl — this is one you’ll want to make tonight.
How to Make
This pie is wonderfully straightforward: a baked chocolate cookie crust and a no-bake peanut butter filling. Prep is mostly mixing and folding; the standout element is the luscious whipped cream folded into peanut butter for lightness. You’ll spend about 15 minutes assembling, 10 minutes baking the crust, and then 4 hours chilling time so the pie can set properly. Total hands-on time: 15–25 minutes. Total time including chilling: about 4–5 hours.
Ingredients
- 1 1/2 cups chocolate cookie crumbs (finely crushed; use a food processor or place cookies in a sealed bag and crush with a rolling pin)
- 1/4 cup unsalted butter, melted (cooled slightly)
- 1 cup creamy peanut butter (room temperature for easy mixing)
- 1 cup powdered sugar (sifted if lumpy)
- 1 cup heavy cream (very cold)
- 1 teaspoon vanilla extract
- 1/2 cup semisweet chocolate chips (for sprinkling on top)
Directions
- Preheat your oven to 350°F (175°C). In a bowl, mix together chocolate cookie crumbs and melted butter until well combined. Press the mixture into the bottom of a pie pan to form a crust. Bake for 10 minutes and then let it cool.
- In a large mixing bowl, beat together the creamy peanut butter and powdered sugar until smooth. Use a hand mixer or stand mixer on low to medium speed; scrape the bowl as needed so everything is fully incorporated.
- In another bowl, whip the heavy cream until soft peaks form, then gently fold it into the peanut butter mixture. Stop folding as soon as the mixture looks uniform to keep the filling light and airy.
- Add vanilla extract and mix until just combined. Taste and adjust — if you prefer a sweeter pie, add a tablespoon more powdered sugar.
- Pour the peanut butter filling into the cooled chocolate crust and spread evenly with a spatula. Smooth the top for a neat presentation.
- Sprinkle the semisweet chocolate chips on top. Press a few slightly into the surface if you want them to stay put.
- Refrigerate the pie for at least 4 hours, or until set. Overnight chilling yields the cleanest slices.
- Serve chilled, and enjoy!
What to Serve With
- Fresh berries or sliced bananas to cut through the richness and add a bright, fruity contrast.
- A dollop of lightly whipped cream or a scoop of vanilla ice cream for extra indulgence.
- Espresso or strong coffee balances the sweetness and highlights the chocolate notes.
- For a festive spread, offer salted caramel sauce or chocolate ganache for drizzling.
Top Tips for Perfecting
- Peanut butter choice: Use a smooth, creamy peanut butter for the best texture. Natural peanut butter can be used but expect a slightly different texture and flavor; if using natural, stir well and make sure it’s not watery.
- Crust pressing: Press the crust evenly into the pan, including slightly up the sides if you like a rim. Use the flat bottom of a measuring cup for an even, compact crust.
- Whipping cream: Chill the mixing bowl and beaters for faster whipping. Stop at soft peaks to make folding easier and prevent over-whipping.
- Flavor boost: Add 1/4 teaspoon of flaky sea salt on top before serving to enhance the sweet-salty dynamic. A tablespoon of cocoa powder or melted chocolate folded into the filling makes it even more chocolatey.
- Avoid watery filling: Make sure your whipped cream is stable. For longer stability, fold in 1 tablespoon of instant vanilla pudding mix with the powdered sugar.
Storing and Reheating Tips
- Refrigeration: Keep the pie covered with plastic wrap or an airtight pie container in the fridge for up to 4 days. Chilled storage maintains texture and flavor.
- Freezing: This pie freezes well. Wrap the whole pie tightly in plastic wrap and foil, freeze up to 1 month. Thaw overnight in the refrigerator before serving. Note: chips on top may soften slightly after thawing.
- Reheating: This pie is best served cold; do not microwave. If you prefer a softer slice, leave it at room temperature for 10–15 minutes before serving.
FAQs
Can I make this pie gluten-free?
Yes. Use gluten-free chocolate sandwich cookies for the crust or substitute with gluten-free chocolate graham crackers to make the crust gluten-free.
Can I use crunchy peanut butter instead of creamy?
Absolutely. Crunchy peanut butter will add texture and small peanut pieces in the filling — it’s a tasty variation if you enjoy a little crunch.
Is there a no-bake option for the crust?
Yes. Instead of baking the crust, press the crumb-butter mixture firmly into the pan and chill for 30–60 minutes to firm up. Baking improves the texture but chilling works in a pinch.
Can I reduce the sugar?
You can reduce powdered sugar slightly, but be careful — it helps with structure. Try reducing by 2–4 tablespoons and taste the filling before chilling.
How do I get clean slices when serving?
Use a sharp knife warmed under hot water and wiped dry between cuts. Chill the pie thoroughly (overnight is best) for the cleanest slices.
Can I make this ahead for a party?
Yes — make it a day ahead and keep refrigerated. If freezing, thaw in the fridge the day before serving.
Conclusion
This Creamy Peanut Butter Pie with Chocolate Crust is a simple, show-stopping dessert that delivers on texture and flavor while being gentle on your schedule and budget. It’s creamy, family-friendly, and flexible — perfect for holidays, potlucks, or an easy weekend treat. If you love exploring variations, check out this Best Chocolate Peanut Butter Pie for another take on the combo: Best Chocolate Peanut Butter Pie. For more technique tips and an alternate preparation, you might also enjoy this detailed Peanut Butter Pie Recipe – Handle the Heat. Give this recipe a try, share slices with friends, and enjoy every creamy bite.

Creamy Peanut Butter Pie with Chocolate Crust
Equipment
- Mixing Bowl
- Pie Pan
- Food Processor
- Hand Mixer
Ingredients
Ingredients
- 1.5 cups Chocolate cookie crumbs Finely crushed; use a food processor or place cookies in a sealed bag and crush with a rolling pin.
- 0.25 cup Unsalted butter Melted and cooled slightly.
- 1 cup Creamy peanut butter Room temperature for easy mixing.
- 1 cup Powdered sugar Sifted if lumpy.
- 1 cup Heavy cream Very cold.
- 1 teaspoon Vanilla extract
- 0.5 cup Semisweet chocolate chips For sprinkling on top.
Instructions
- Preheat your oven to 350°F (175°C). In a bowl, mix together chocolate cookie crumbs and melted butter until well combined. Press the mixture into the bottom of a pie pan to form a crust. Bake for 10 minutes and then let it cool.
- In a large mixing bowl, beat together the creamy peanut butter and powdered sugar until smooth. Use a hand mixer or stand mixer on low to medium speed; scrape the bowl as needed so everything is fully incorporated.
- In another bowl, whip the heavy cream until soft peaks form, then gently fold it into the peanut butter mixture. Stop folding as soon as the mixture looks uniform to keep the filling light and airy.
- Add vanilla extract and mix until just combined. Taste and adjust — if you prefer a sweeter pie, add a tablespoon more powdered sugar.
- Pour the peanut butter filling into the cooled chocolate crust and spread evenly with a spatula. Smooth the top for a neat presentation.
- Sprinkle the semisweet chocolate chips on top. Press a few slightly into the surface if you want them to stay put.
- Refrigerate the pie for at least 4 hours, or until set. Overnight chilling yields the cleanest slices.
- Serve chilled, and enjoy!