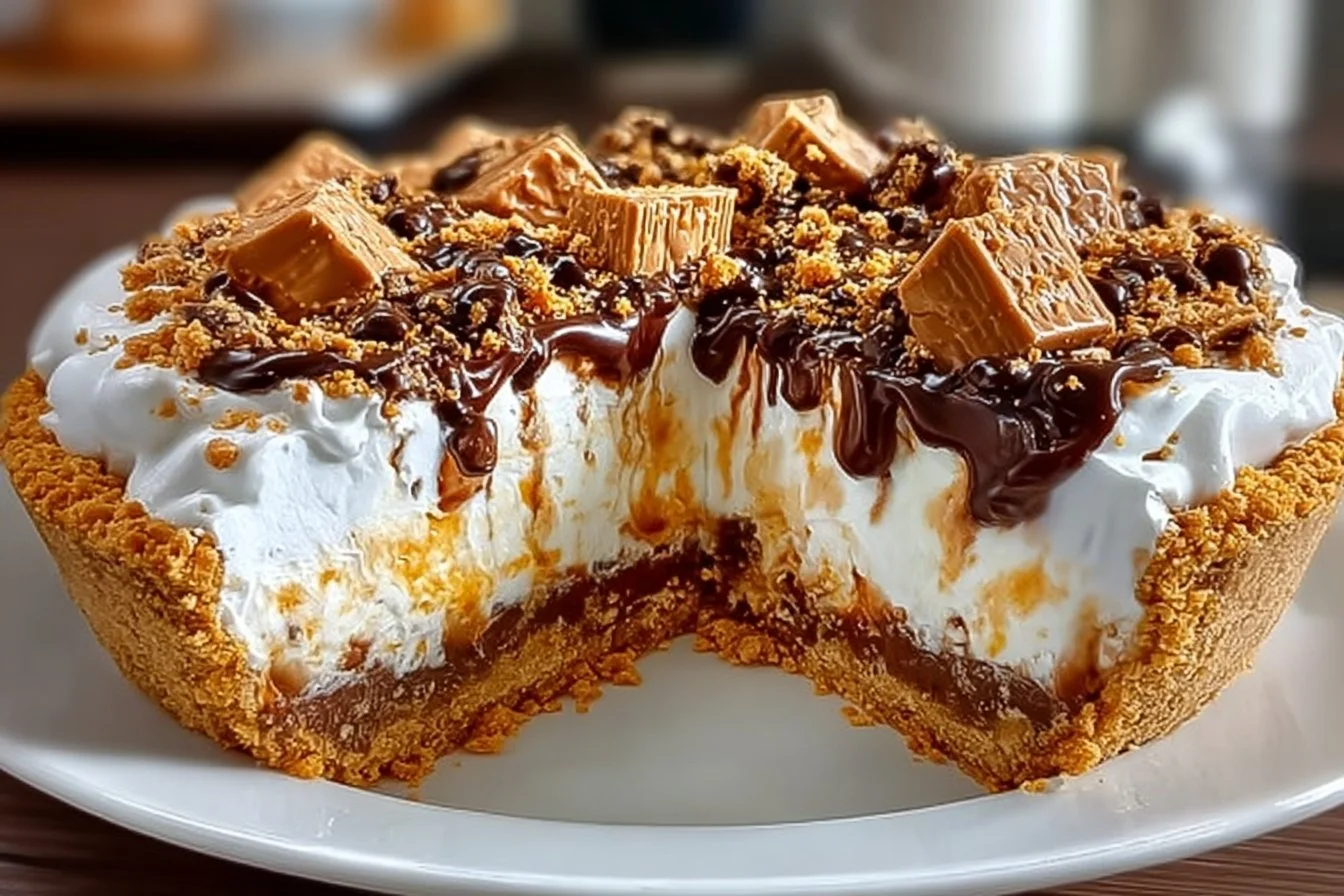
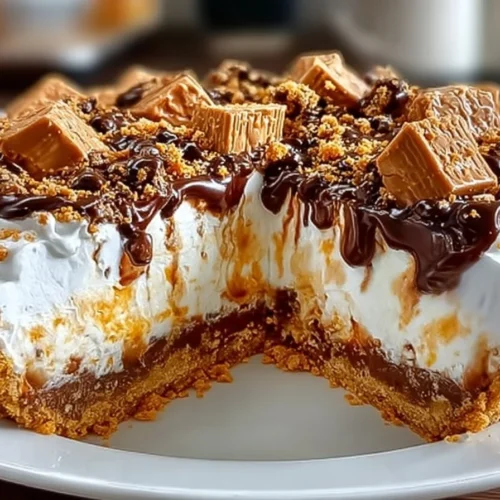
When a craving hits for something sweet, creamy, and a little bit nostalgic, nothing satisfies quite like a Butterfinger Pie. Imagine a fluffy whipped peanut butter filling packed with chunks of real Butterfinger candy, all nestled in a buttery graham cracker crust. The first bite is always a showstopper—crunchy, chocolatey, and melt-in-your-mouth delicious. Did you know that Butterfinger was first introduced way back in 1923? That beloved candy bar has remained a favorite for generations, and this easy pie brings it to life in a whole new way. This Butterfinger Pie stands out for its simplicity, speed, and irresistible flavors, making it a must-try for families, parties, or last-minute guests. If you’ve been a fan of my Oreo Cheesecake Pie, you’ll love this winning dessert. So grab a mixing bowl, gather up your favorite candy bars, and get ready to fall head over heels for your new go-to treat!
What is Butterfinger Pie?
Butterfinger Pie—now there’s a name that stirs up curious questions! Is it a pie made entirely out of candy bars? Did it get its name because you need buttery fingers to make it? Actually, it’s just so finger-lickin’ good that it’ll make you forget about spoons altogether. The real magic is in how this no-bake pie transforms crushed Butterfinger candies into a delightfully creamy, crunchy dessert everyone loves. They say the way to a man’s heart is through his stomach, but trust me, this pie will win over just about anyone you share it with. Ready for a bite of pure happiness? Give this recipe a try and let yourself indulge!
Why You’ll Love This
Butterfinger Pie is all about indulgence with a playful twist. The star of the show, of course, is the real Butterfinger candy packed into every bite—giving you a textbook balance of rich peanut butter flavor, crispy candy bits, and luscious, creamy filling. Making this pie at home saves you both time and money, sparing you a trip to the bakery and letting you enjoy dessert on your schedule. Plus, because you control the ingredients, you can make big portions for half the price of store-bought treats! One of my favorite things about this pie is the mountain of crushed Butterfingers on top—each forkful is a flavor explosion. Compared to the Peanut Butter Chocolate Pie recipe, this one boasts even more texture and a familiar candy-crunch you can’t replicate with anything else. Why not make both for your next family gathering? Trust me, after trying this recipe, you may never want to order dessert out again!
How to Make Butterfinger Pie
Quick Overview
Butterfinger Pie shines as a quick, easy, and wildly satisfying dessert. This is a no-fuss, no-bake recipe you can whip together in just 15 minutes (plus chilling time). Its creamy peanut butter filling and crunchy Butterfinger topping make every bite completely irresistible, and there’s no need to turn on the oven—just mix, chill, and enjoy! You’ll love how effortless it is to impress your friends and family with a treat that tastes like it took hours.
Ingredients
- 1 package (8 oz) cream cheese, softened
- 1 container (8 oz) whipped topping (like Cool Whip)
- 1 cup powdered sugar
- 1/2 cup creamy peanut butter
- 3 Butterfinger candy bars, crushed (divided use)
- 1 pre-made graham cracker crust
- 1/2 teaspoon vanilla extract
Instructions
- In a large mixing bowl, beat the softened cream cheese and powdered sugar together until the mixture is completely smooth and creamy.
- Add in the creamy peanut butter and vanilla extract, then continue mixing until well combined and silky.
- Gently fold in the whipped topping with a spatula, taking care not to deflate it. The mixture should look light and fluffy.
- Stir in two of the crushed Butterfinger candy bars, reserving one for the topping. Mix just until the candy is evenly distributed throughout the filling.
- Spoon the creamy mixture into your pre-made graham cracker crust. Use a spatula to smooth the top for a tidy finish.
- Sprinkle the remaining crushed Butterfinger pieces generously over the top, pressing down lightly so they stay put.
- Cover the pie and refrigerate for at least 4 hours or, for best results, overnight. This helps the flavors meld and the filling to set.
- Slice, serve cold, and watch everyone fall in love with this creamy, crunchy treat!
What to Serve With Butterfinger Pie
Butterfinger Pie is rich and satisfying on its own, but it pairs beautifully with a few simple sides. For a complete dessert spread, try serving it with a scoop of vanilla ice cream or a small bowl of fresh mixed berries—their refreshing tartness balances the pie’s sweetness. A mug of strong brewed coffee or a glass of cold milk enhances every nutty, chocolatey bite. Want to make it a star attraction? Serve alongside my Easy Chocolate Mousse or a no-bake cheesecake for a dazzling dessert sampler platter.
Top Tips for Perfecting Butterfinger Pie
- Use room temperature cream cheese for a smoother filling; cold cream cheese can leave lumps.
- Can’t find Butterfinger bars? Substitute with other crispy peanut butter candy bars for a similar crunch.
- For a lighter twist, try using low-fat cream cheese and reduced-fat whipped topping—no one will taste the difference!
- Don’t skip chilling the pie; it needs time to firm up and for the flavors to meld. Four hours is the minimum, but overnight is best.
- Fold in the whipped topping gently to keep the filling airy and cloud-like.
- If you want an extra peanut buttery punch, drizzle some melted peanut butter over the pie before topping with Butterfinger crumbs.
Storing and Reheating Tips
To keep your Butterfinger Pie tasting fresh, cover it tightly with plastic wrap or aluminum foil and refrigerate. It will stay delicious for up to 4 days in the fridge—if it lasts that long! If you want to freeze the pie, do so before adding the final candy topping; wrap the pie well and freeze up to one month. Thaw overnight in the fridge before serving, then sprinkle with fresh crushed Butterfingers just before slicing. This pie should be served chilled—no reheating necessary! Avoid leaving leftovers at room temperature for more than two hours to maintain its creamy texture and food safety.
FAQs
Can I use homemade whipped cream instead of store-bought?
Absolutely! Just whip about 1 cup of heavy whipping cream with a bit of sugar until soft peaks form, then swap it one-for-one for the whipped topping.
Can I make Butterfinger Pie ahead of time?
Yes! This pie actually tastes even better after chilling overnight. Just be sure to add the Butterfinger topping right before serving for maximum crunch.
What’s the best way to crush the Butterfinger bars?
Place them, still wrapped, in a zip-top bag and lightly tap with a rolling pin. You want big chunks for crunch as well as a bit of fine dust for extra flavor.
Can I use a different type of crust?
Definitely. Chocolate cookie crust, peanut butter cookie crust, or even a homemade graham cracker base all work well with this versatile filling.
Is this recipe gluten-free?
You can easily make it gluten-free by using a gluten-free pie crust and ensuring your whipped topping is certified gluten-free. Always check the candy bar ingredients to be safe!
Conclusion
Butterfinger Pie is truly the ultimate easy dessert—no baking, no stress, and absolutely no leftovers! It’s perfect for birthdays, potlucks, or any time you want to surprise your loved ones with something fun and delicious. With a silky peanut butter filling and loads of crunchy Butterfinger pieces, each slice is guaranteed to bring smiles all around. Don’t forget to explore some of my other no-bake desserts and let me know how your Butterfinger Pie turns out in the comments! Enjoy every creamy, crunchy, candy-studded bite!
Butterfinger Pie
Equipment
- Mixing Bowl
- Spatula
- Pie Dish
Ingredients
Ingredients
- 1 package Cream Cheese, softened 8 oz package
- 1 container Whipped Topping 8 oz container (like Cool Whip)
- 1 cup Powdered Sugar
- 1/2 cup Creamy Peanut Butter
- 3 bars Butterfinger Candy Bars, crushed divided use
- 1 pre-made crust Graham Cracker Crust
- 1/2 teaspoon Vanilla Extract
Instructions
- In a large mixing bowl, beat the softened cream cheese and powdered sugar together until the mixture is completely smooth and creamy.
- Add in the creamy peanut butter and vanilla extract, then continue mixing until well combined and silky.
- Gently fold in the whipped topping with a spatula, taking care not to deflate it. The mixture should look light and fluffy.
- Stir in two of the crushed Butterfinger candy bars, reserving one for the topping. Mix just until the candy is evenly distributed throughout the filling.
- Spoon the creamy mixture into your pre-made graham cracker crust. Use a spatula to smooth the top for a tidy finish.
- Sprinkle the remaining crushed Butterfinger pieces generously over the top, pressing down lightly so they stay put.
- Cover the pie and refrigerate for at least 4 hours or, for best results, overnight. This helps the flavors meld and the filling to set.
- Slice, serve cold, and watch everyone fall in love with this creamy, crunchy treat!
2 comments
What size of butterfingers? 3 big sized ones or 3 small sized ones?
1uyPhyROa