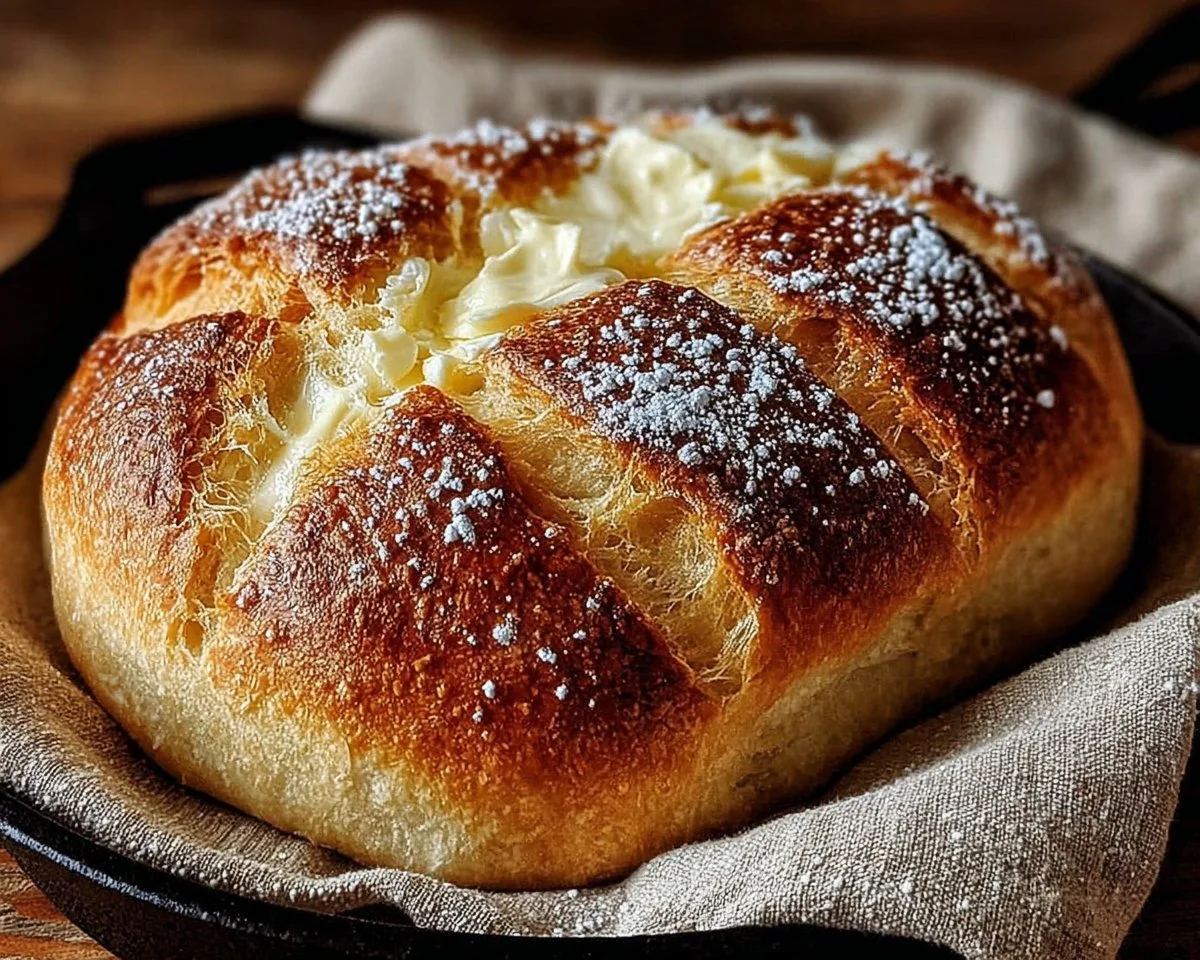
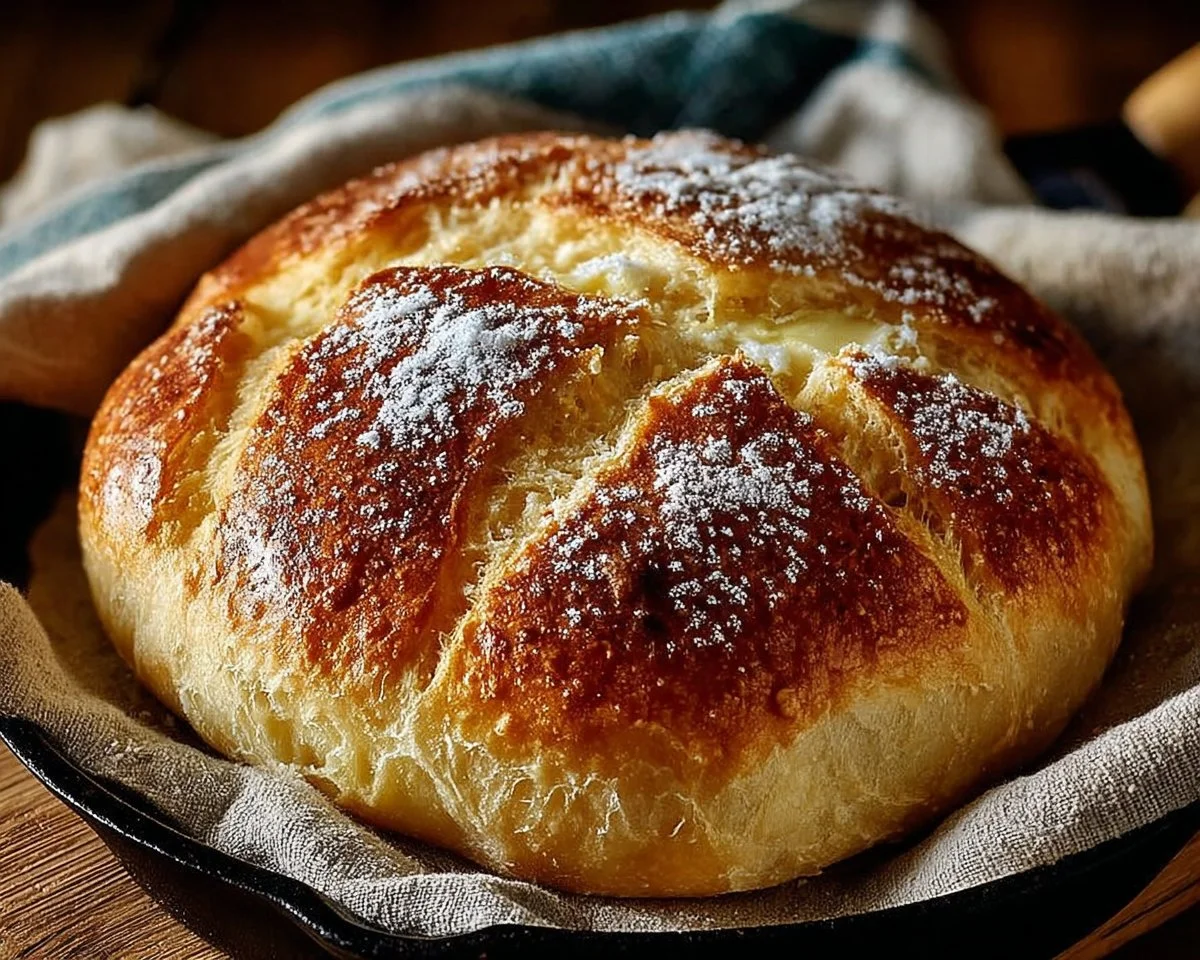
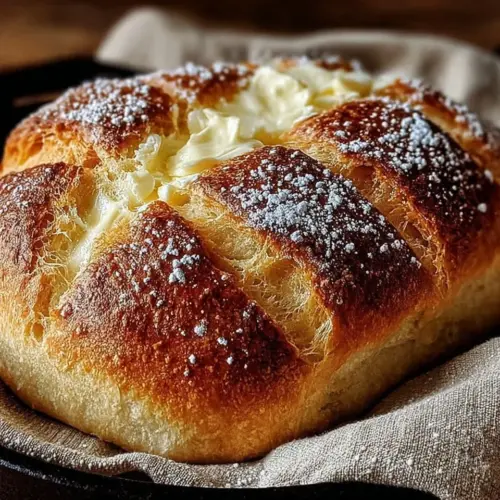
Creamy, warm, and impossibly comforting, No-Oven Stovetop Bread is the kind of simple miracle that turns a handful of pantry staples into something your whole family will love. This easy-to-make loaf browns to a golden crust in a skillet and stays soft inside — perfect for dunking into soups, sopping up sauces, or building hearty sandwiches. Fun fact: many cultures have versions of stovetop breads because ovens weren’t always common in homes — so you’re reconnecting with a long tradition of cozy cooking.
If you’re short on time or oven space, this method is a game-changer. For another comforting twist on bread-based desserts, see our apple pie bread pudding recipe which uses day-old bread for a decadent sweet treat. Or if you want a straightforward stovetop loaf guide, check this no-oven stovetop bread recipe for more tips. Ready to get your hands a little floury and make something wonderful? Let’s go!
What is No-Oven Stovetop Bread?
What’s in a name? No-Oven Stovetop Bread is exactly what it sounds like: a full loaf made and finished on the stove instead of inside a conventional oven. Curious where the idea came from — cold nights, no electricity, or just clever home cooks? Probably all of the above. Imagine a humble cast-iron skillet acting as a tiny oven on your stovetop — magic. Some say this bread earned its charm because “the way to a man’s heart is through his stomach.” Whether you’re feeding family, impressing friends, or just craving fresh bread, this recipe is playful, practical, and downright delicious. Give it a try and see why stovetop bread keeps coming back to kitchen tables.
Why You’ll Love This
- Highlight: The crust becomes nicely golden while the inside remains soft and pillowy. Each bite offers a contrast of crunch and tender crumb that pairs beautifully with butter or savory spreads.
- Cost-saving: Making bread at home saves money and reduces trips to the bakery. These basic ingredients are pantry-friendly and low-cost, making this loaf an affordable staple.
- Flavorful finishes: Add a brush of melted butter, sprinkle coarse salt, or rub with garlic for immediate flavor upgrades. Toppings and dipping oils make each serving adaptable to breakfast, lunch, or dinner.
Compared to richer, yeastier artisan loaves, this stovetop version is quicker and more approachable while still delivering satisfying texture. If you enjoyed our other easy bread recipes, you’ll find this one just as rewarding. Try it — you’ll be glad you did.
How to Make:
Quick Overview
This recipe is designed to be straightforward: mix a soft dough, let it rise, then cook it slowly in a skillet until golden. The texture is soft inside with a slightly crisp exterior. Standout elements include the buttery richness from melted butter and a tender crumb from proper kneading and rising. Expect about 20 minutes hands-on time and 1.5 to 2 hours total including rising.
Prep time: 20 minutes
Rise time: 1 to 1.5 hours + 30 minutes
Cook time: 10–14 minutes
Total time: About 2 hours
Ingredients
1 cup all-purpose flour, measured and leveled
1 teaspoon baking powder, sifted with the flour if possible
1/4 teaspoon salt, fine
1/4 cup unsalted butter, melted and slightly cooled
1/2 cup milk, room temperature
1 egg, lightly beaten and room temperature
1/4 cup warm water, about 105–110°F (warm to the touch, not hot)
1 teaspoon sugar, adjust based on preference (helps yeast activate)
1 teaspoon active dry yeast
1 tablespoon olive oil, for frying (plus a little more if needed to coat the skillet)
Directions
- In a small bowl, combine warm water, sugar, and yeast. Stir gently and let sit for 5-10 minutes until foamy. If it does not foam, the yeast may be inactive; try fresh yeast and warm water again.
- In a large bowl, whisk together flour, baking powder, and salt until evenly combined. This keeps the rise even and avoids salty pockets.
- Make a well in the center of the dry ingredients. Pour in the foamy yeast mixture, melted butter, milk, and beaten egg. Mix with a wooden spoon or your hand until a soft, slightly sticky dough forms.
- Turn the dough out onto a lightly floured surface. Knead for 8-10 minutes until the dough is smooth, elastic, and slightly tacky but not overly sticky. Add a dusting of flour as needed to prevent sticking.
- Lightly oil a clean bowl and place the dough inside. Cover loosely with a damp cloth or plastic wrap and let it rise in a warm, draft-free spot for 1 to 1.5 hours, or until doubled in size.
- After the first rise, gently punch down the dough to release air. Shape it into a compact loaf or round shape that will fit comfortably in your skillet. Place it on a lightly floured surface and allow it to rise for another 30 minutes, covered.
- Heat a non-stick skillet over medium-low heat and add 1 tablespoon olive oil, swirling to coat the pan. Reduce heat to low-medium — you want gentle, even cooking so the inside cooks through without burning the outside.
- Place the shaped dough into the skillet, cover with a tight-fitting lid, and cook for 5-7 minutes per side. Check for a deep golden brown color before flipping. Use a spatula or tongs to flip carefully. If the crust is getting too dark, lower the heat.
- Remove the bread from the skillet and let it cool on a rack for 10-15 minutes before slicing. Cooling helps the crumb set and makes slicing easier.
What to Serve With
- Soft butter and flaky sea salt for a simple classic pairing.
- Herb-infused olive oil or garlic butter for dipping.
- Hearty soups like tomato basil, lentil, or chicken noodle; this bread soaks up broths beautifully.
- Fresh salads such as a crisp green salad, Greek salad, or a warm grain bowl for a balanced meal.
- Cheese board: mild cheeses, cured meats, pickles, and fruit make for an easy shareable platter.
Top Tips for Perfecting
- If your yeast doesn’t foam, discard and try again with warmer water or fresher yeast.
- Kneading matters: don’t skimp on the 8–10 minutes to develop gluten for the best texture.
- Keep heat low to medium-low while cooking so the center bakes through without burning the crust.
- For extra flavor, brush the top with melted butter and sprinkle herbs or coarse salt right after cooking.
- Short on time? Let the dough rise in a slightly warmer spot to shorten rising time, but never rush the final rising completely.
Storing and Reheating Tips
- Room temperature: Store wrapped in a clean tea towel or in a bread box for up to 2 days.
- Refrigeration: Not recommended for long-term storage; refrigeration can dry bread faster. Use within 2–3 days if refrigerated.
- Freezing: Slice and freeze in an airtight bag for up to 3 months. Toast or reheat slices directly from frozen.
- Reheating: Warm whole loaves in a covered skillet over very low heat for 5–8 minutes, or slice and toast for a crisper finish. A quick 10–12 minute stint in a 350°F oven wrapped in foil also refreshes frozen loaves.
FAQs
Can I use active dry yeast instead of instant yeast?
Yes. This recipe uses active dry yeast. Make sure to proof it in warm water with sugar first so it becomes foamy before adding to the dough.
Can I make this bread without kneading?
You can try a no-knead variation, but expect a different texture. Traditional kneading develops the gluten needed for the loaf’s structure and chew.
What skillet is best for stovetop bread?
A heavy-bottomed skillet like cast iron gives even heat and a better crust. Use a non-stick if you prefer easier release, but watch heat carefully.
Can I add herbs or cheese to the dough?
Absolutely. Fold in chopped fresh herbs, grated cheese, or minced garlic during the final stages of mixing for flavored bread.
How will I know when the bread is fully cooked inside?
Tap the bottom — it should sound hollow. A thermometer should read about 190–200°F when inserted into the center for fully baked bread.
Conclusion
This No-Oven Stovetop Bread is one of those recipes that proves simple ingredients and a little patience can yield something truly comforting and impressive. It’s economical, family-friendly, and adaptable to sweet or savory toppings — perfect for weeknight dinners, lazy weekends, or impromptu guests. If you’d like more background or a different stovetop bread variation, check out this external reference for another take on the technique: No-Oven Stovetop Bread – Clara quick dinners. Give this recipe a try, share it with someone you love, and enjoy the warm reward of homemade bread.
No-Oven Stovetop Bread
Equipment
- Mixing Bowl
- Non-stick Skillet
Ingredients
Dry Ingredients
- 1 cup all-purpose flour measured and leveled
- 1 teaspoon baking powder sifted with the flour if possible
- 1/4 teaspoon fine salt
Wet Ingredients
- 1/4 cup unsalted butter melted and slightly cooled
- 1/2 cup milk room temperature
- 1 large egg lightly beaten and room temperature
- 1/4 cup warm water about 105–110°F (warm to the touch, not hot)
- 1 teaspoon sugar adjust based on preference (helps yeast activate)
- 1 teaspoon active dry yeast
- 1 tablespoon olive oil for frying (plus a little more if needed to coat the skillet)
Instructions
- In a small bowl, combine warm water, sugar, and yeast. Stir gently and let sit for 5-10 minutes until foamy.
- In a large bowl, whisk together flour, baking powder, and salt until evenly combined.
- Make a well in the center of the dry ingredients. Pour in the foamy yeast mixture, melted butter, milk, and beaten egg. Mix until a soft, slightly sticky dough forms.
- Turn the dough out onto a lightly floured surface. Knead for 8-10 minutes until smooth and elastic.
- Lightly oil a clean bowl and place the dough inside. Cover and let it rise in a warm spot for 1 to 1.5 hours, or until doubled in size.
- After the first rise, punch down the dough and shape it into a loaf. Let it rise for another 30 minutes.
- Heat a non-stick skillet over medium-low heat and add olive oil. Reduce heat to low-medium.
- Place the dough in the skillet, cover, and cook for 5-7 minutes per side until golden brown.
- Remove the bread from the skillet and let it cool on a rack for 10-15 minutes before slicing.